
Add dynamic content to your homepage by displaying a list of client projects from your CMS Collection data, which you can easily update in the future. Give your visitors a pleasant viewing experience through uniform structure, visual repetition, and rhythm in your design — and set yourself up for success by establishing Heading hierarchy.

In this lesson, you’ll learn how to add a CMS Collection to your project and pull its data into your visual design using the following:
- Set up the structure
- Create a CMS Collection
- Add a CMS item
- Import projects from CSV
- Build out the design
Follow along and download the assets for this lesson.
Set up the structure
Let’s add a Section to showcase client projects on the homepage:
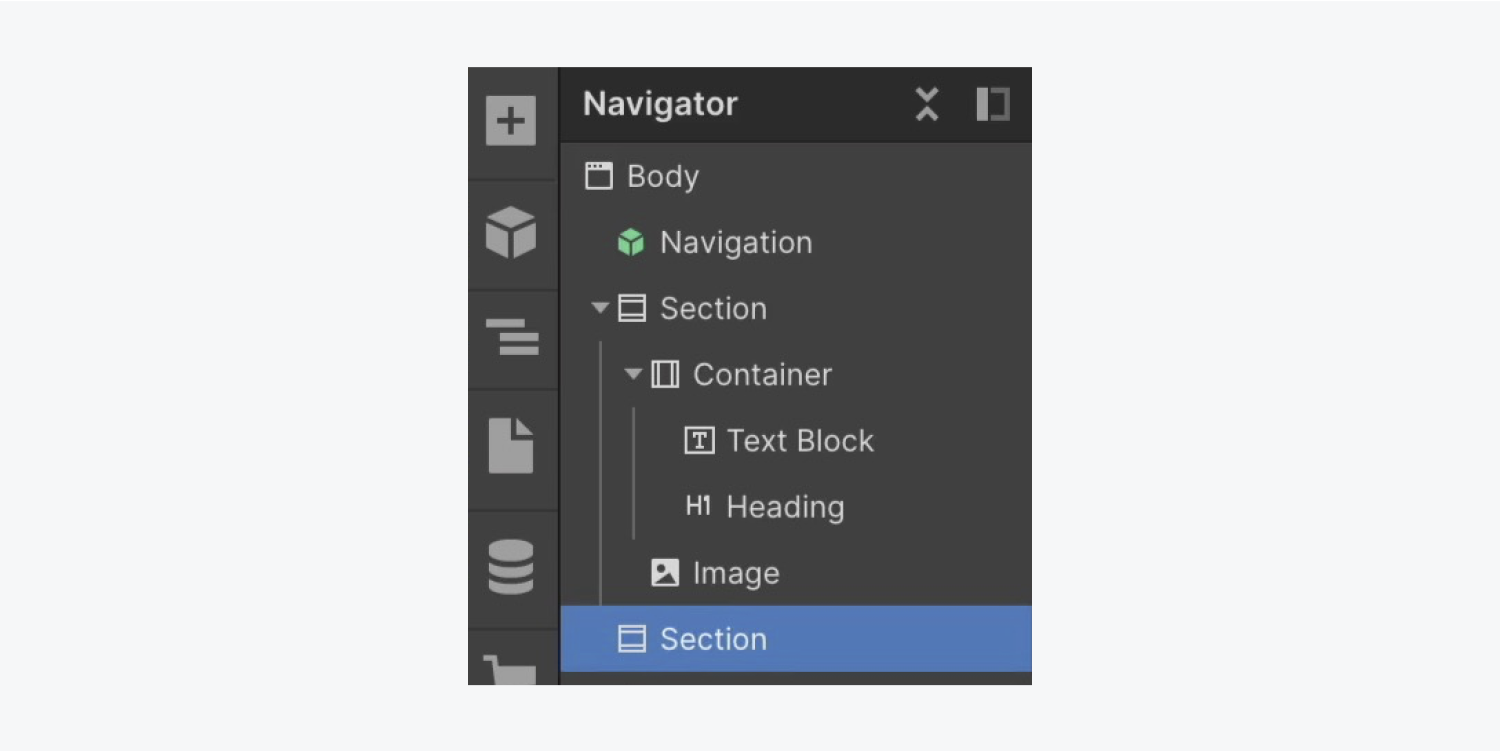
- Open the Navigator
- Open the Add panel
- Drag a Section into the Navigator and place it at the bottom under the existing Section
Let’s reuse the “Section” class on our new Section to bring along the 60 pixels of top and bottom padding we had styled before:
- Open the Style panel
- Click into the Selector field
- Choose “Section” from Existing classes
Let’s add a Heading to our new Section and set it to be an H2 since we already have our first, top-level Heading set as an H1:
- Open the Add panel
- Drag a Heading into the new Section
- Choose H2 as the heading type
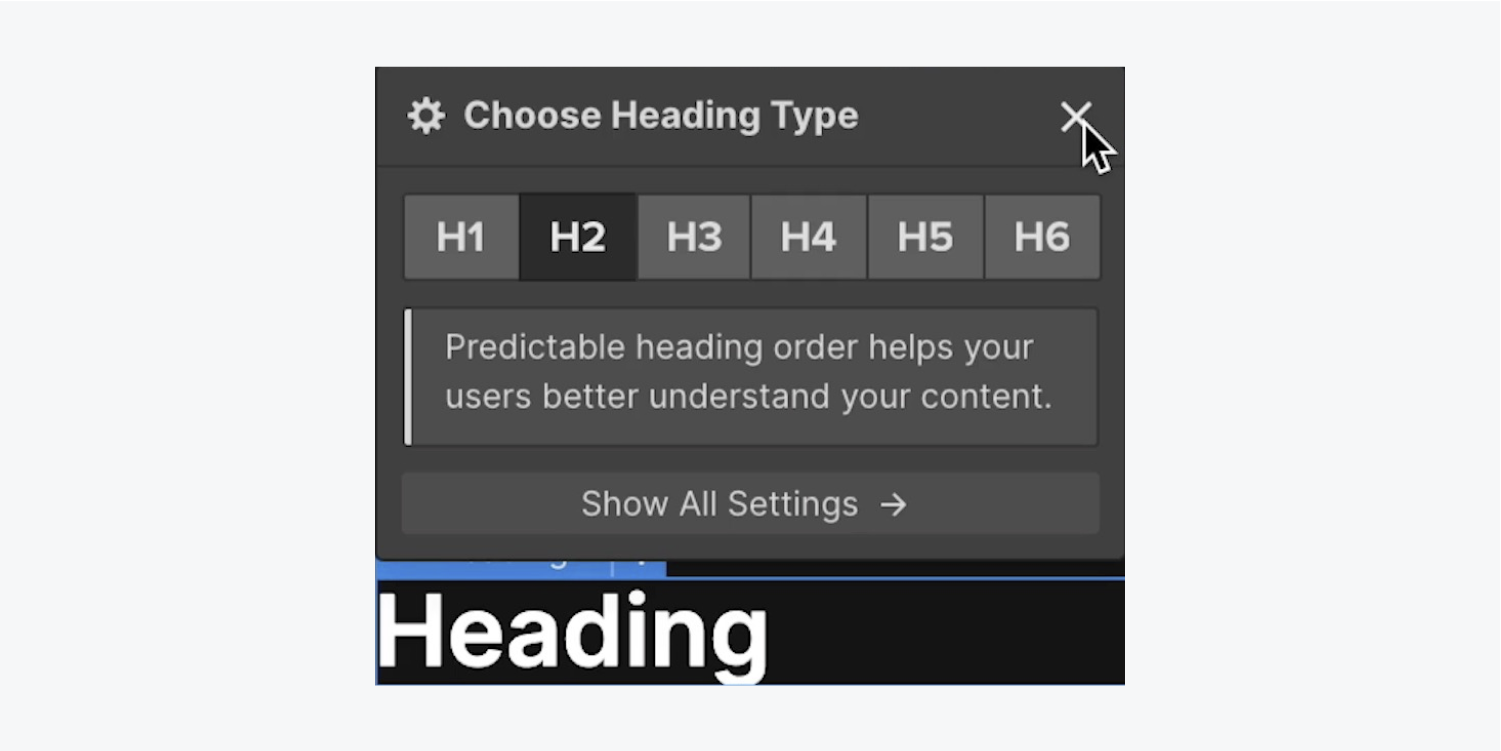
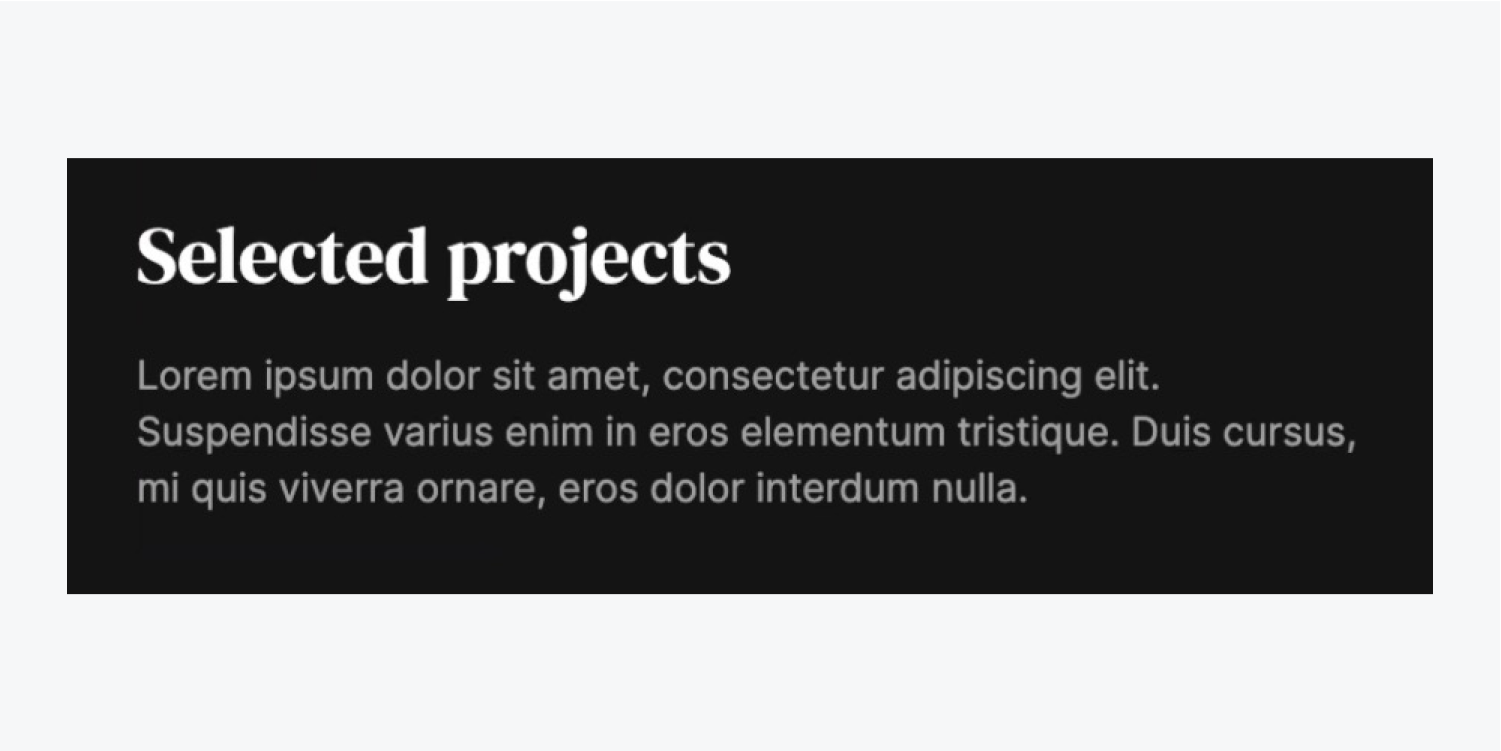
Double click the H2 to change the default heading text (e.g., “Selected projects”)
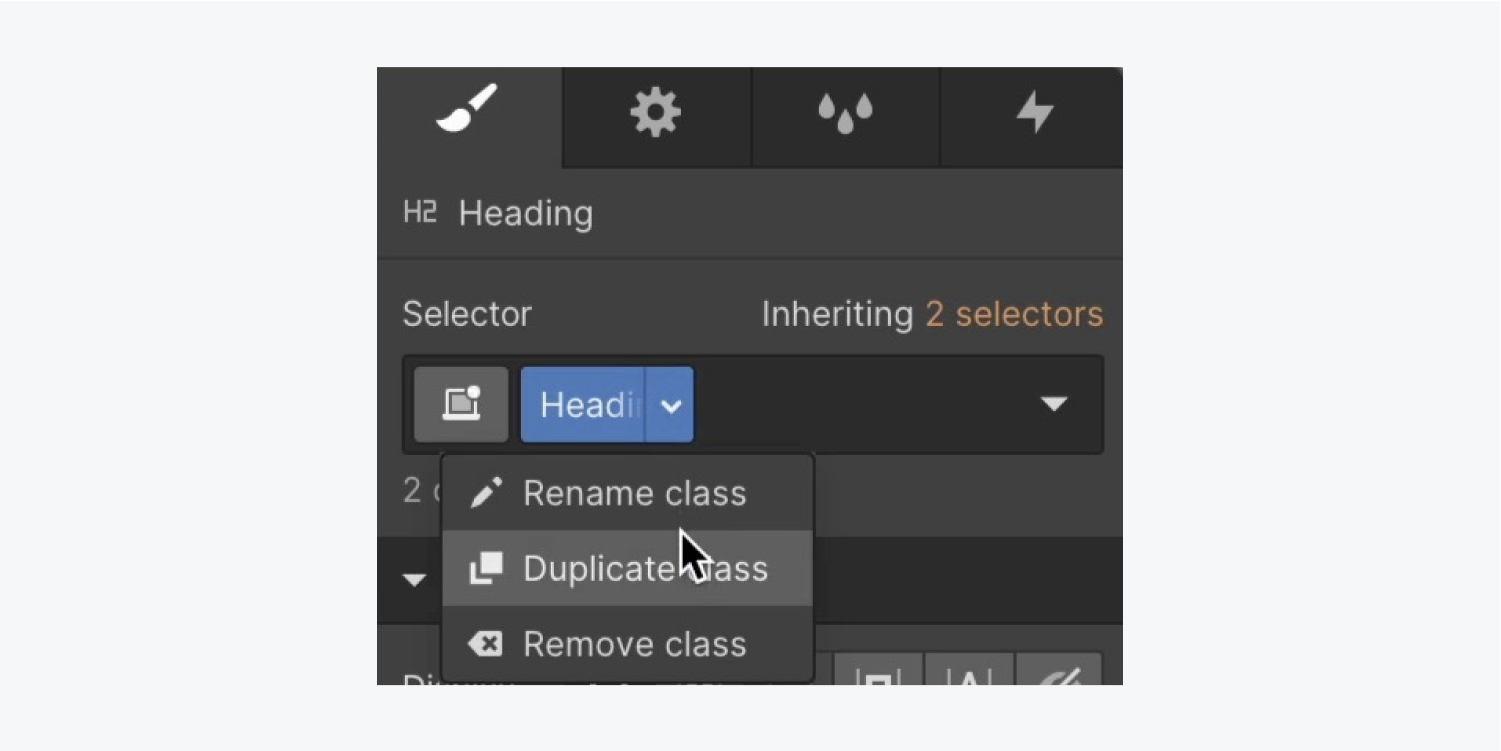
Let’s duplicate the “Heading” class on the H2 to create a new secondary heading class with new styles:
- Open the Style panel
- Click into the Selector field
- Choose “Heading” from Existing classes
- Click the “Heading” class and select Duplicate class from the dropdown
- Rename the new class (e.g., “Secondary heading”)
Read more about how to duplicate classes.
Because the H2 should be smaller than your H1 in your page’s visual hierarchy, let’s decrease the font size on the new “Secondary heading” class:
- Open Style panel > Typography
- Set the font Size to 28 pixels
To keep your H2 neatly bound inside your new Section, let’s add a Container to the new Section and place the H2 inside the Container:
- Open the Add panel
- Drag a Container inside the new Section
- Choose the “Secondary heading” and drag it into the Container
- Select the Container and click into the Selector field
- Choose “Container” from Existing classes
Note: When you add a class to an element, all styling adjustments made on this element are saved in this class. You can reuse the class on new elements to automatically apply the styles saved in the class you created.
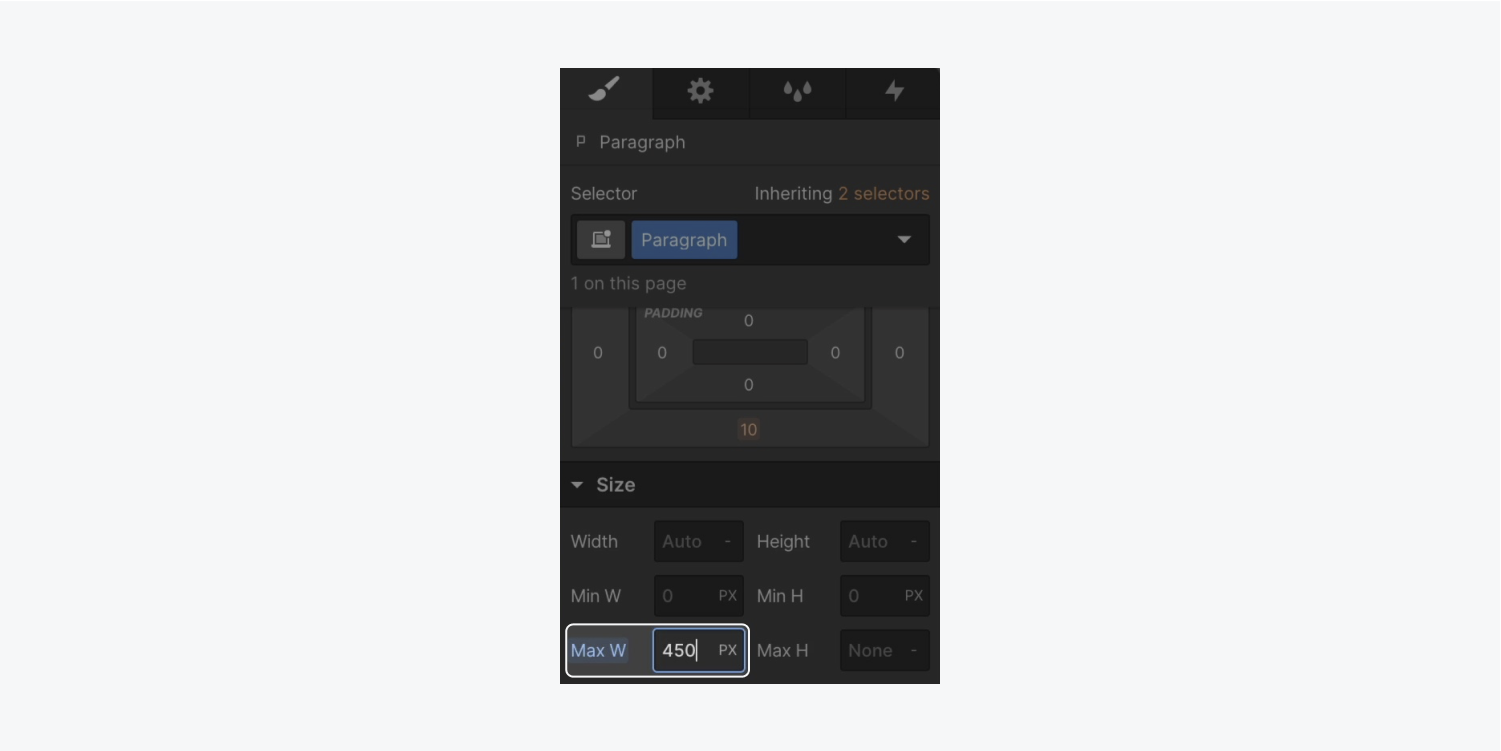
Let’s add a Paragraph to the Container and give it a smaller maximum width:
- Open the Add panel
- Drag a Paragraph under the “Secondary heading”
- Open Style panel > Size
- Set Max W to 450 pixels
Let’s reduce the space between the “Secondary heading” and the Paragraph:
- Select the “Secondary heading”
- Open Style panel > Spacing
- Decrease the bottom margin to 15 pixels
Let’s also change the opacity of the Paragraph:
- Select the Paragraph
- Open Style panel > Typography
- Click the color picker and set the opacity to 60
Good to know: You can build accessibility right into your design workflow by using the color contrast analyzer to make more accessible color choices.
Let’s also remove the 20 pixels of top margin on our “Secondary heading” to make sure spacing between elements matches:
- Select the “Secondary heading”
- Open Style panel > Spacing
- Set the top margin to 0 pixels
Create a CMS Collection
A CMS, a content management system, lets us set up a database to manage a collection of information so we can design with it visually. That collection of information — that data — could be client projects, blog posts, or menu items (among other things).
When we link parts of our design to our data (via placeholders), we can design faster when we add new data to our Collection that adhere to the designs we build out.
Let’s add a CMS Collection to our project and create the framework to hold our data:
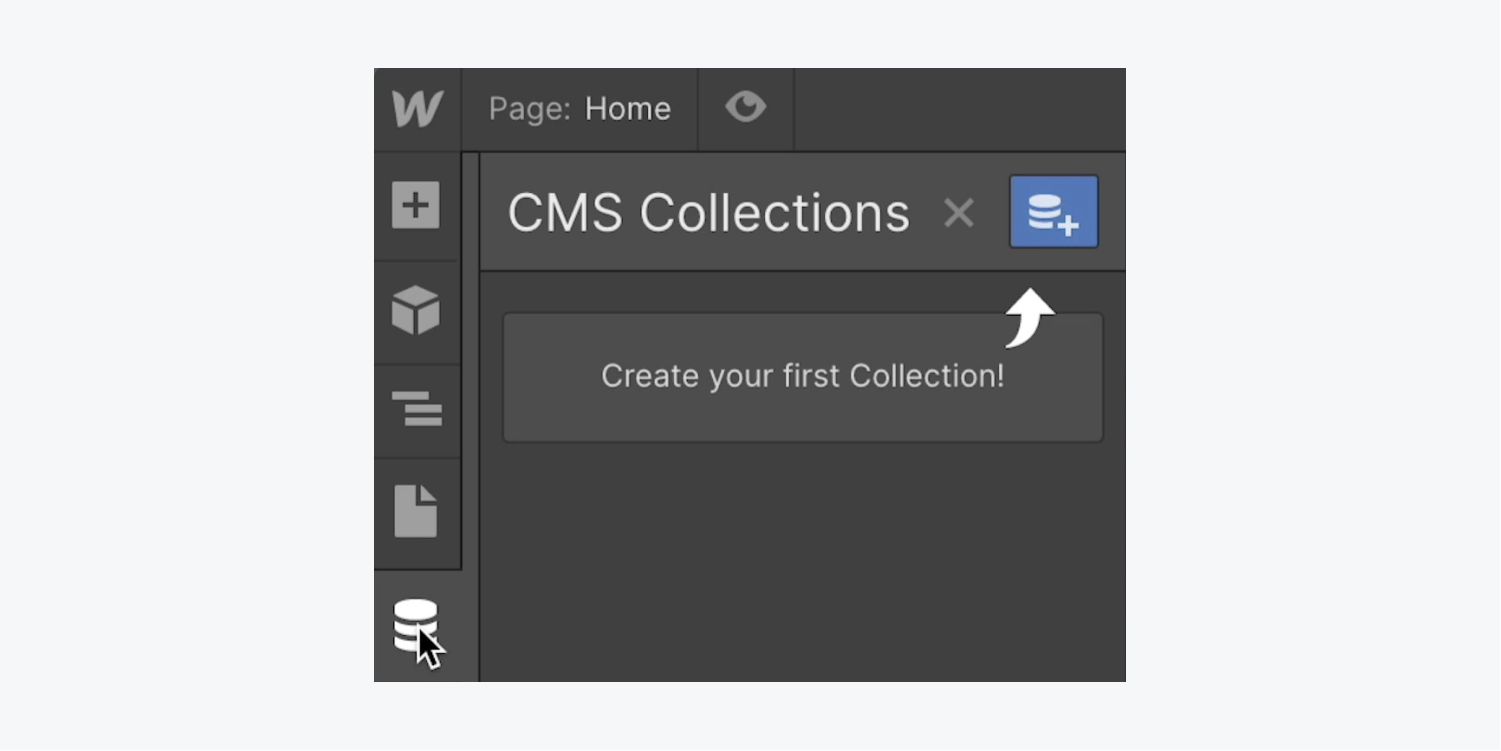
- Open the CMS panel from the left side of the Designer
- Press the “Create CMS Collection” button
- Name your Collection (e.g., “Projects”)
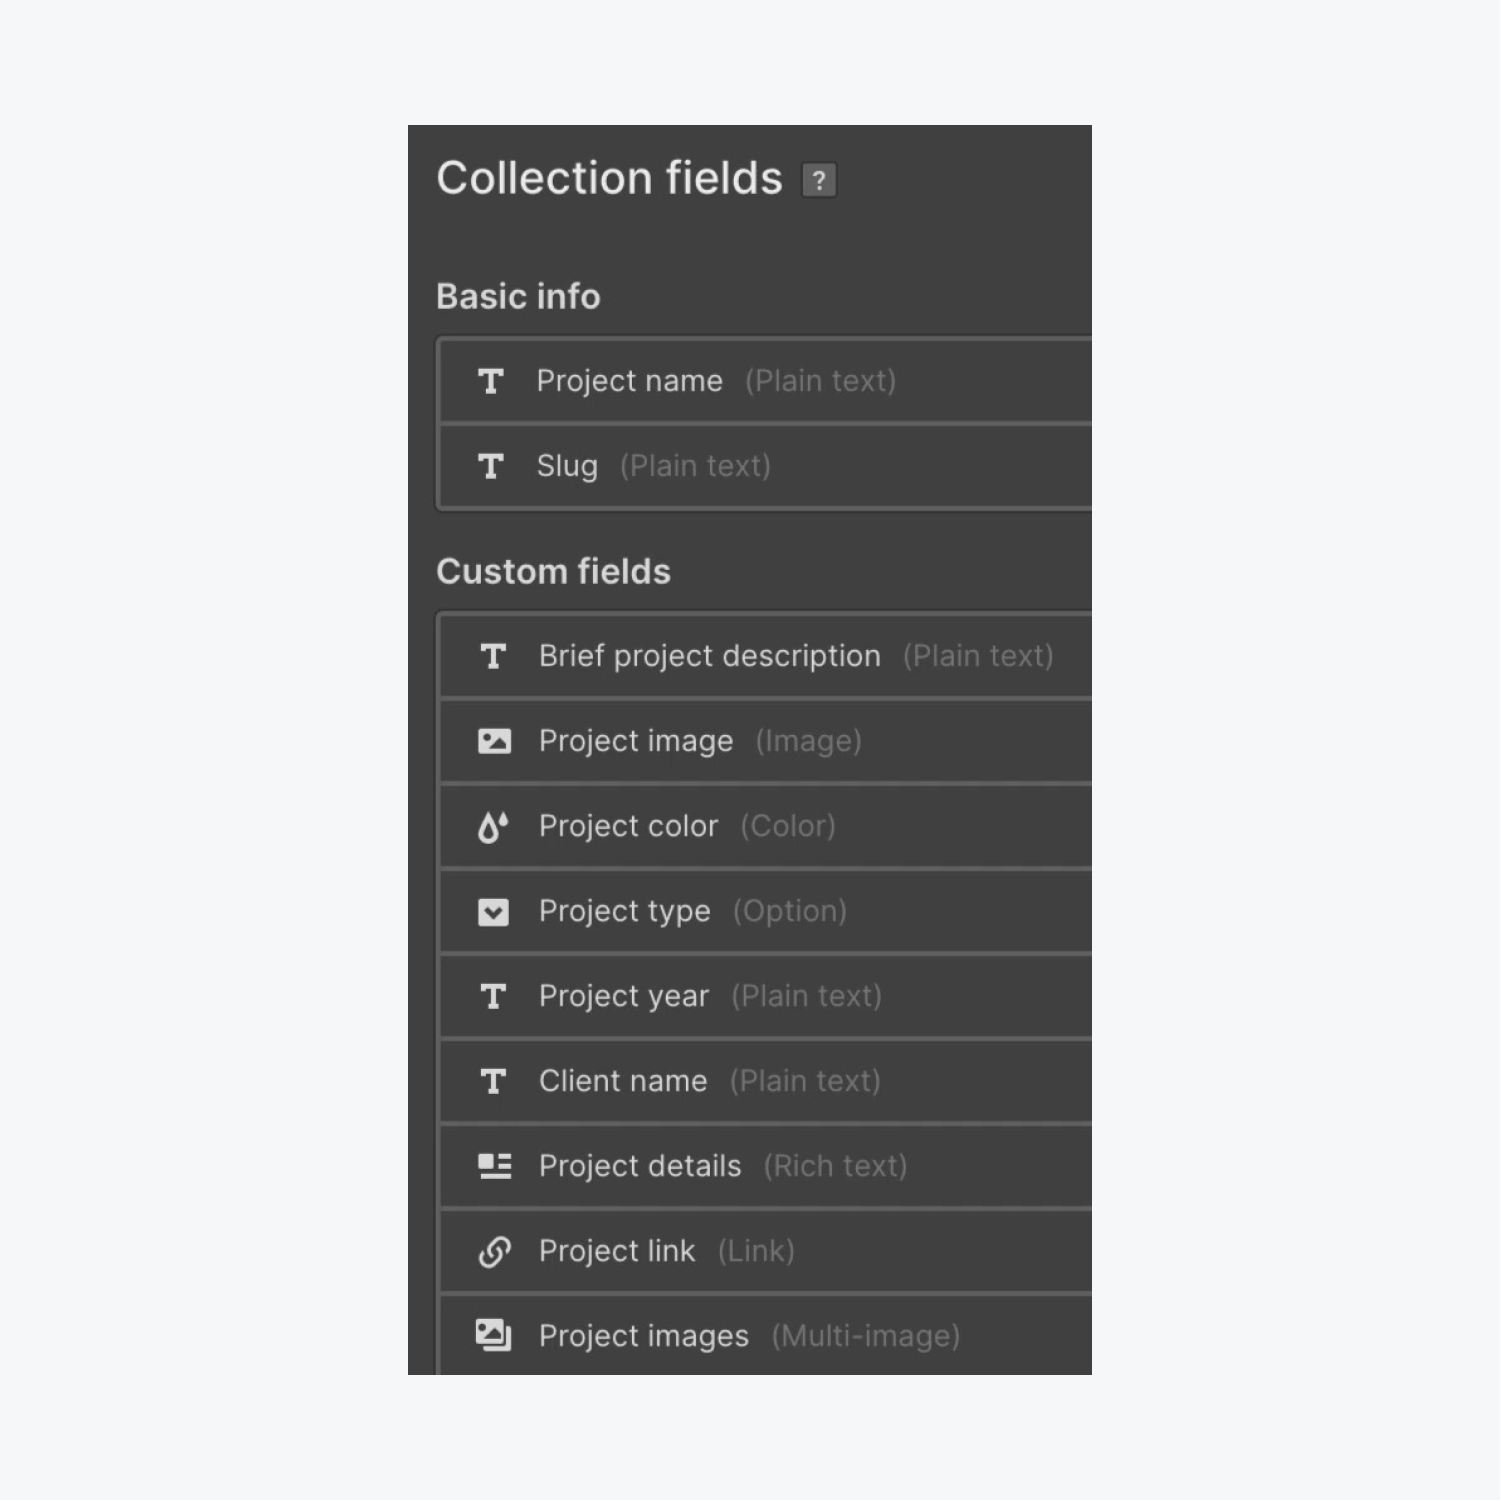
Because each Collection field holds the data for each client project you’ll showcase, you’ll want to create fields for every type of data you want to track.
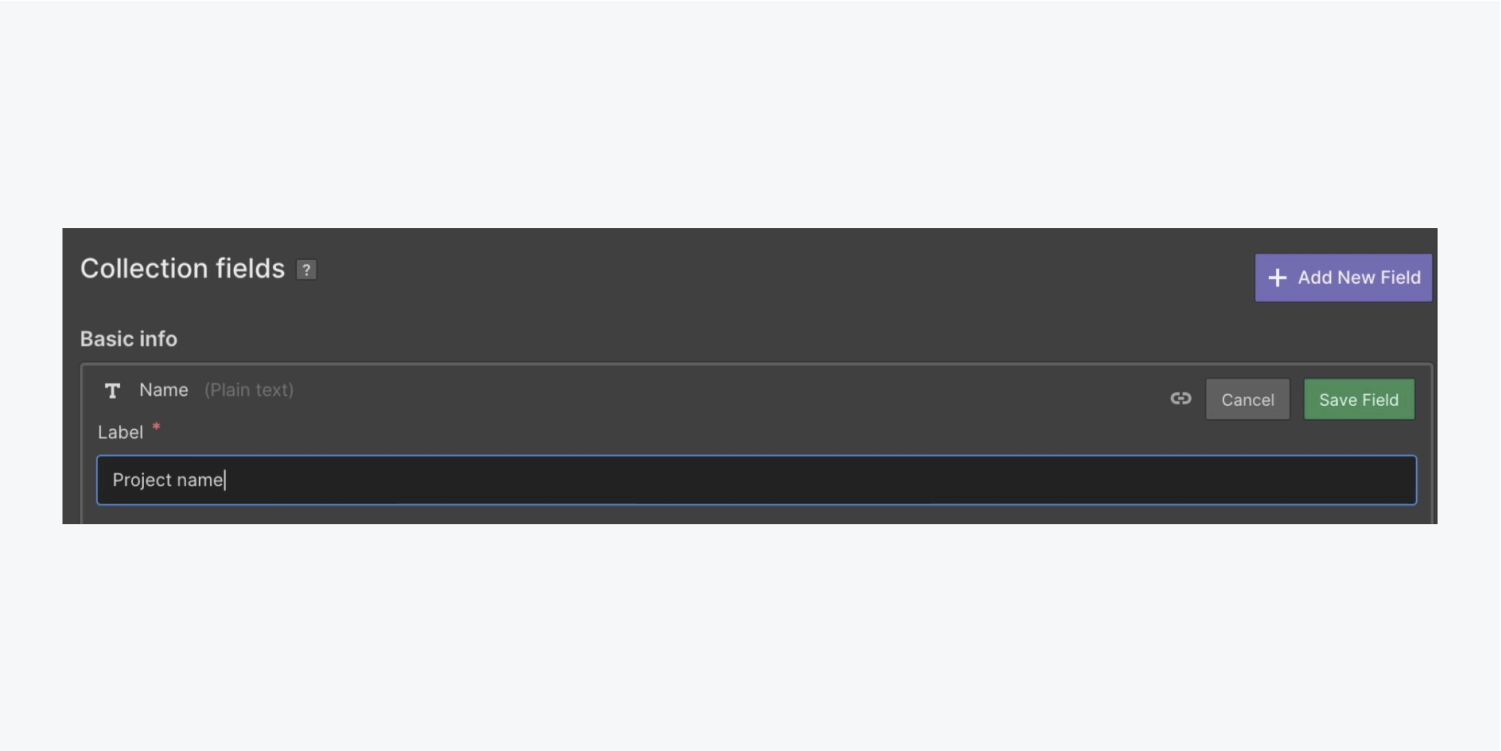
Let’s add our first Collection field to the Collection:
- Click “Name” under Basic info in Collection fields
- Update the default text (e.g., “Project name”)
We’ll add 8 more custom Collection fields, which will eventually contain unique data for:
- Clients
- Project image
- Project color
- Project type
- Project year
- Client name
- Project link
- Multiple project images
Let’s add the “Clients” Collection field, which includes a brief description of the client:
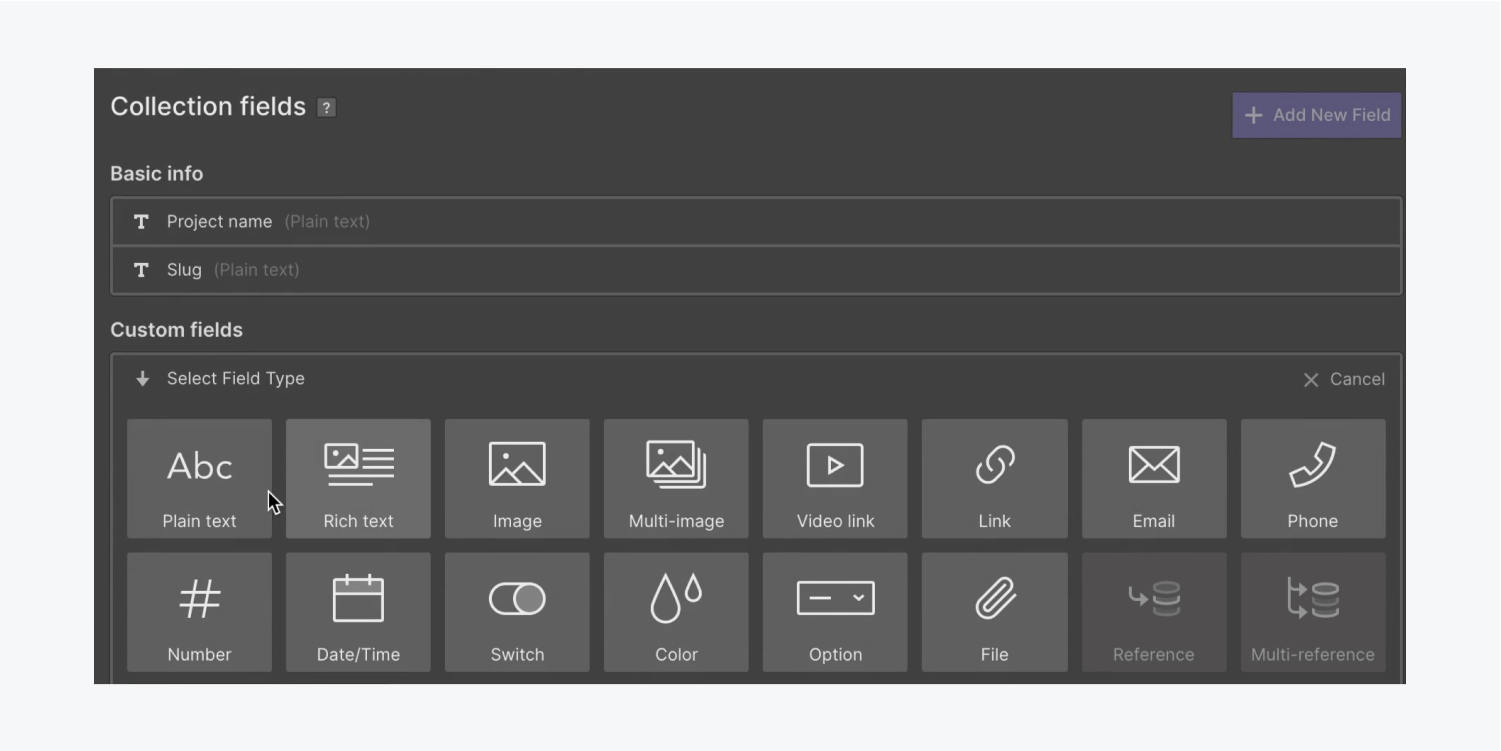
- Press the Add new field button
- Choose Plain text as the Field type
- Add a Label (e.g., “Brief project description”)
Add the “Project image” Collection field:
- Press the Add new field button
- Choose Image as the Field type
- Add a Label (e.g., “Project image”)
Add the “Project color” Collection field (you can design with this color — it can be unique and matched to each project):
- Press the Add new field button
- Choose Color as the Field type
- Add a Label (e.g., “Project color”)
Add a “Project type” Collection field as well as some options to choose from:
- Press the Add new field button
- Choose Option as the Field type
- Add a Label (e.g., “Project type”)
- Click “Add option,” name it (e.g., “Illustration”), and press enter to save
Repeat step 4 above to add 3 additional options — project types — you want to feature:
- “Web design”
- “Prototyping”
- “UX design”
Save the Option field.
Add the “Project year” Collection field:
- Press the Add new field button
- Choose Plain text as the Field type
- Add a Label (e.g., “Project year”)
Add the “Client name” Collection field:
- Press the Add new field button
- Choose Plain text as the Field type
- Add a Label (e.g., “Client name”)
Add the “Project details” Collection field:
- Press the Add new field button
- Choose Rich text as the Field type
- Add a Label (e.g., “Project details”)
Add the “Project link” Collection field:
- Press the Add new field button
- Choose Link as the Field type
- Add a Label (e.g., “Project link”)
Add the “Project year” Collection field:
- Press the Add new field button
- Choose Multi-image as the Field type
- Add a Label (e.g., “Project images”)
Press “Create collection” to create and save this collection.
Add a CMS item
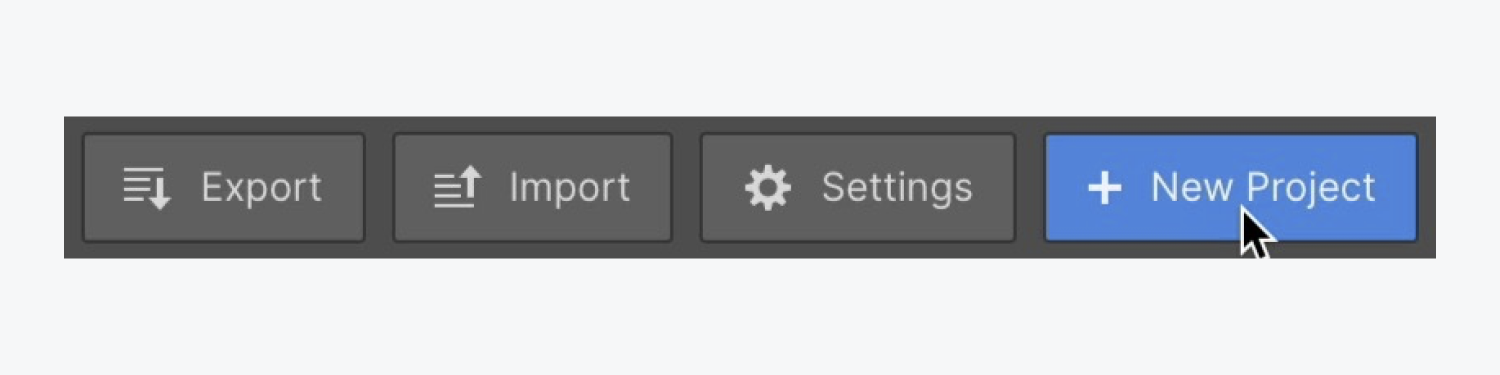
After you press “Create collection” you have a blank database to which you can add a new project:
- Press the “New project” button to create your first project in your Collection
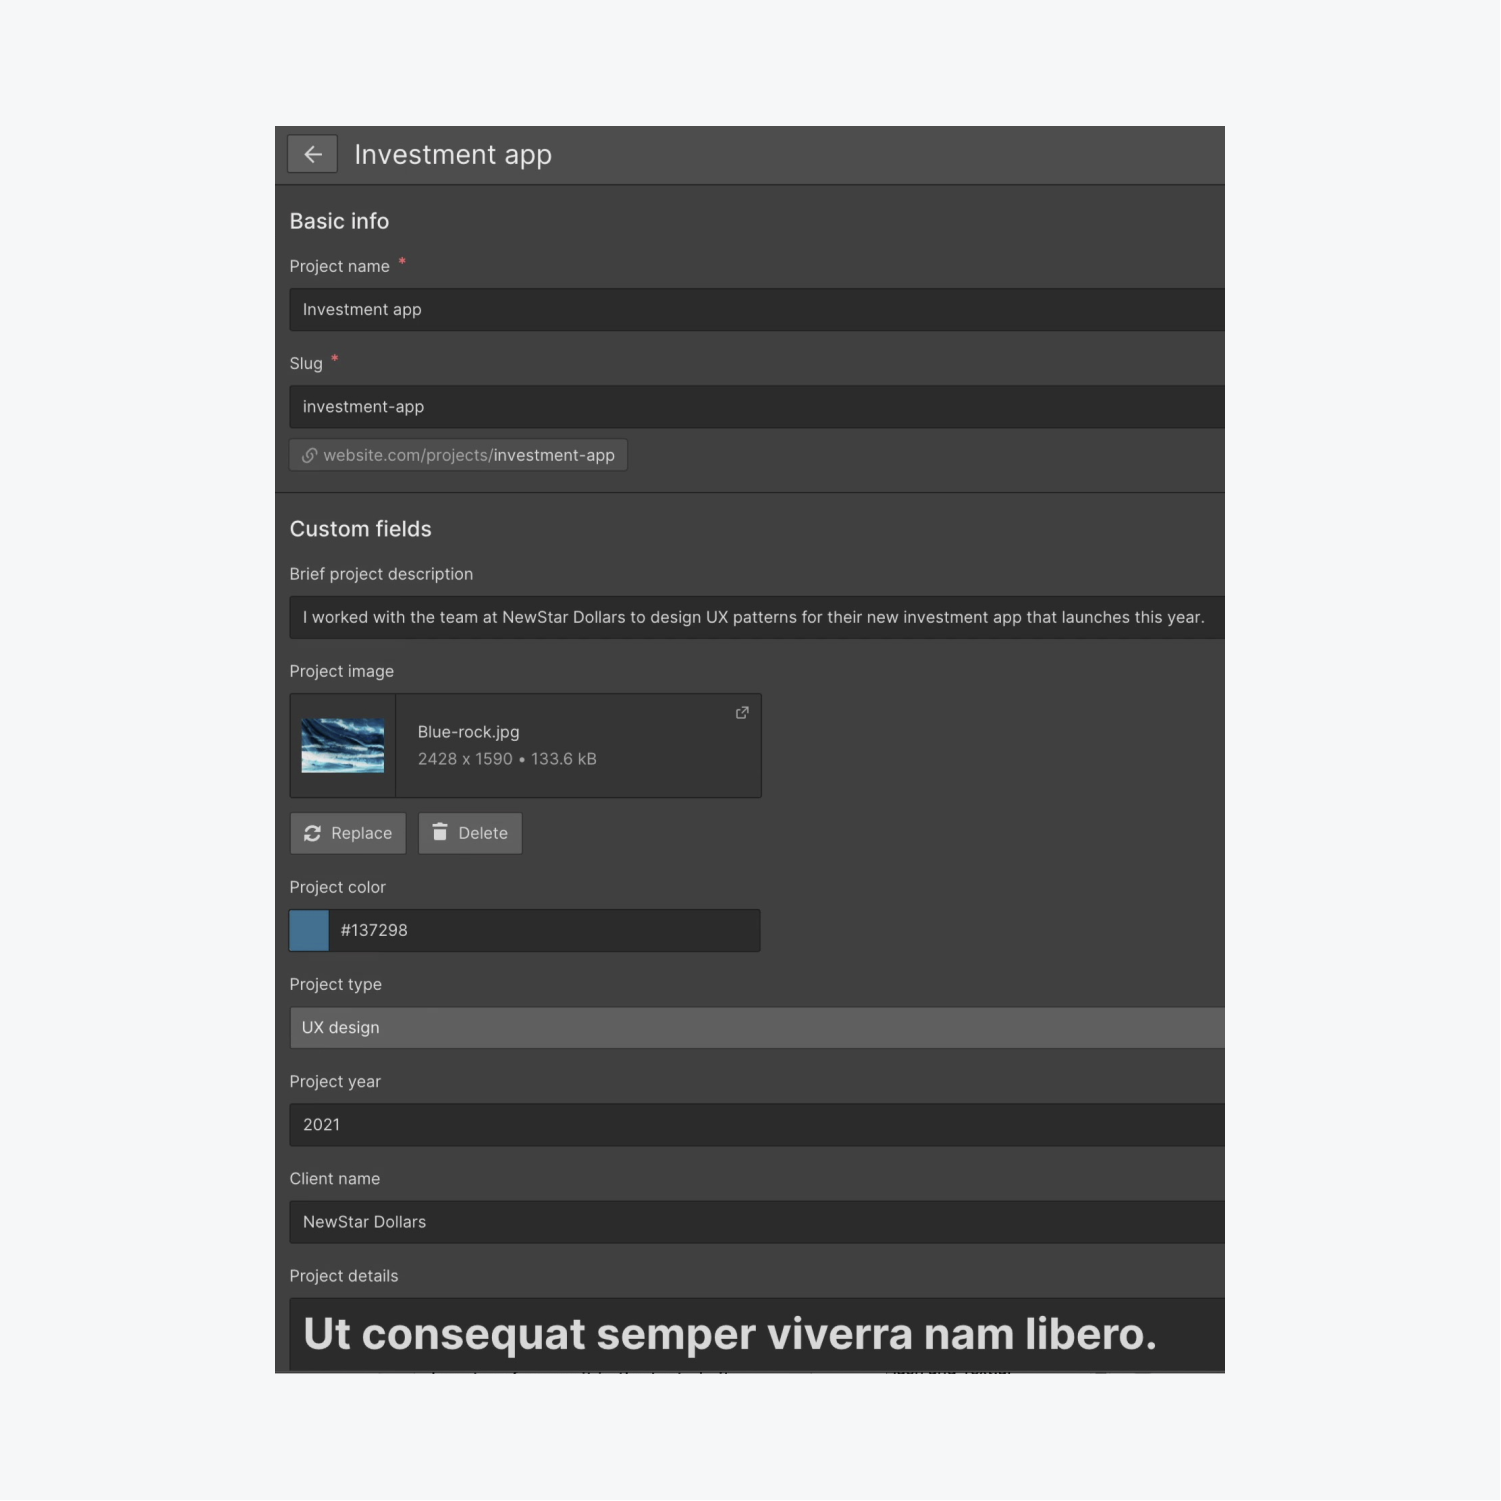
Let’s add some information into the Collection fields we created, which populates into the respective project in our Collection:
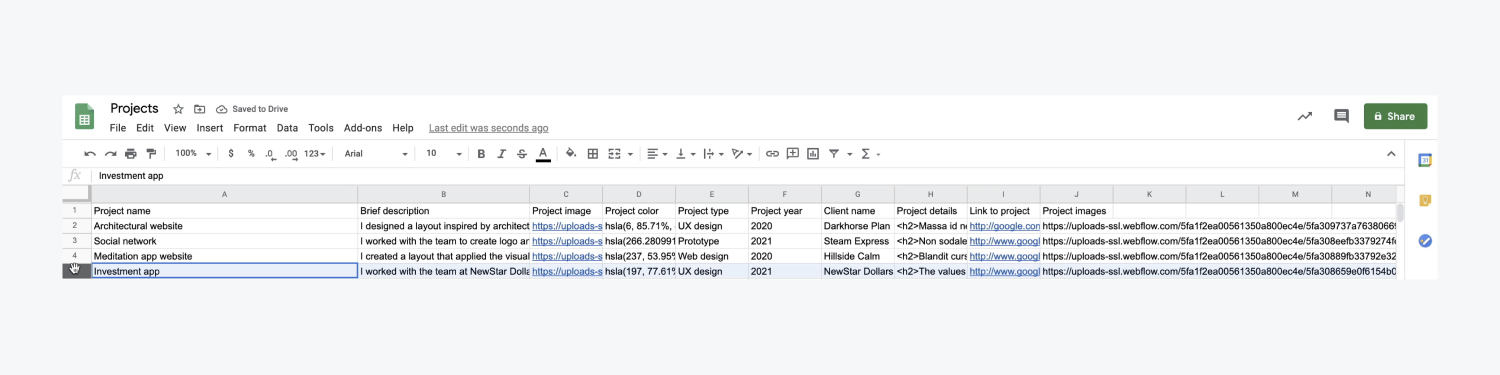
- Give the project a name in the “Project name” field (e.g., “Investment app”)
- Add a description to the “Brief project description” field (e.g., “I worked with the team at NewStar Dollars to design UX patterns for their new investment app that launches this year.”)
- Drag an Image into the “Project image” field (e.g. “Blue-rock.jpg”)
- Paste in a “Project color” (e.g., “#137298”)
- Choose the “UX design” option from the “Project type” dropdown
- Add a “Project year” (e.g., “2021”)
- Add a “Client Name” (e.g., “NewStar Dollars”)
- Type or paste in the “Project details” text (this can be filler text like Lorem Ipsum)
- Add a “Project link” (e.g., “google.com”)
- Drag multiple Images into “Project images” (e.g., “Blue-pink-color.jpg,” “Blue-red-color.jpg,” “Blue-wave.jpg,” and “Color-drip.jpg”)
- Press “Create” to save the new CMS item

Import projects from CSV
You can continue to enter this information manually for each new project you’d like to create, but there is a faster way to do this.
If you have all the data you’d like to add to your CMS Collection in CSV (comma separated value) format, you can import that data directly into your Collection. To avoid creating duplicate projects, let’s prepare the CSV file and remove the “Investment app” project you manually added in previous steps:
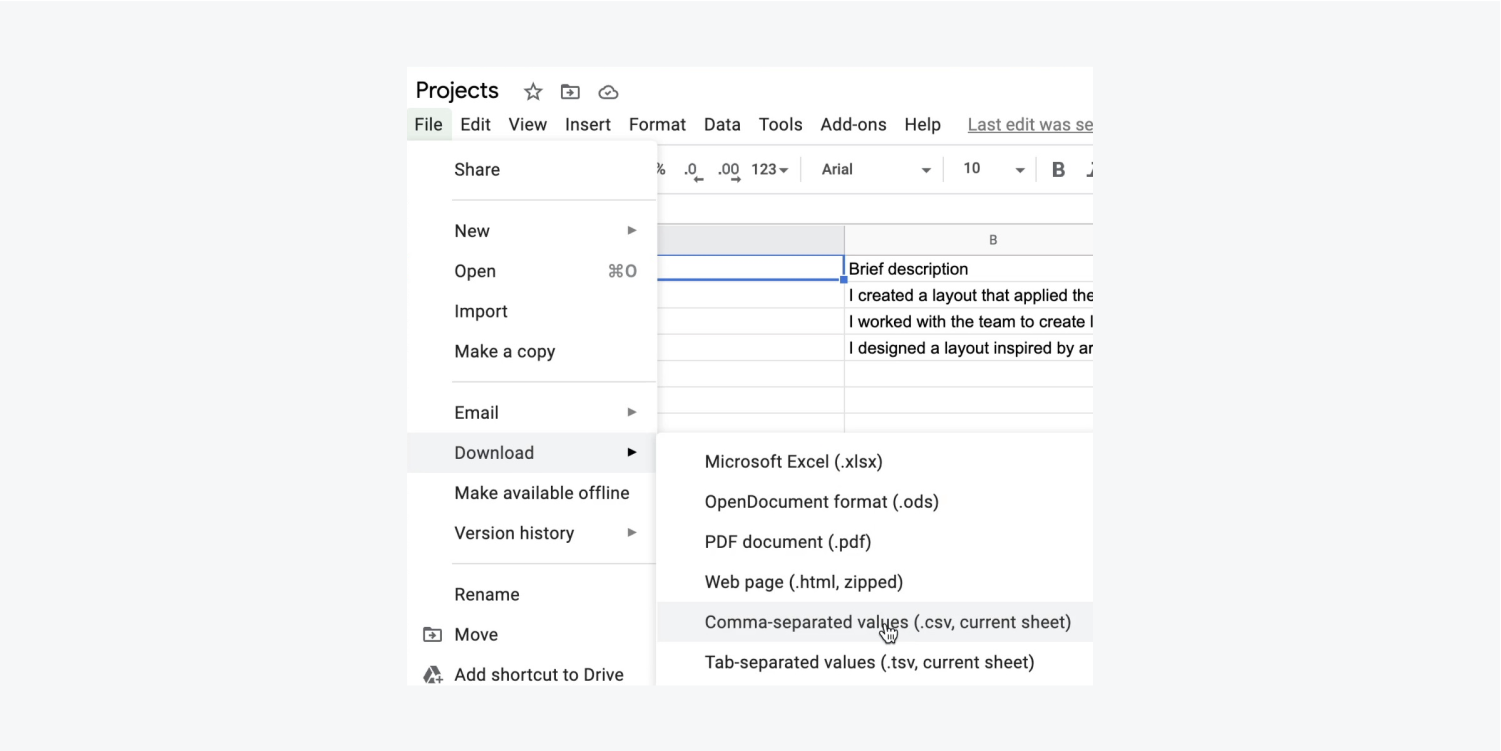
- Open the “Client projects.csv” file and delete the fifth row (e.g., the “Investment app” project)
- Save the “Client projects.csv” file
Now that the CSV file is ready to go, let’s import its data:
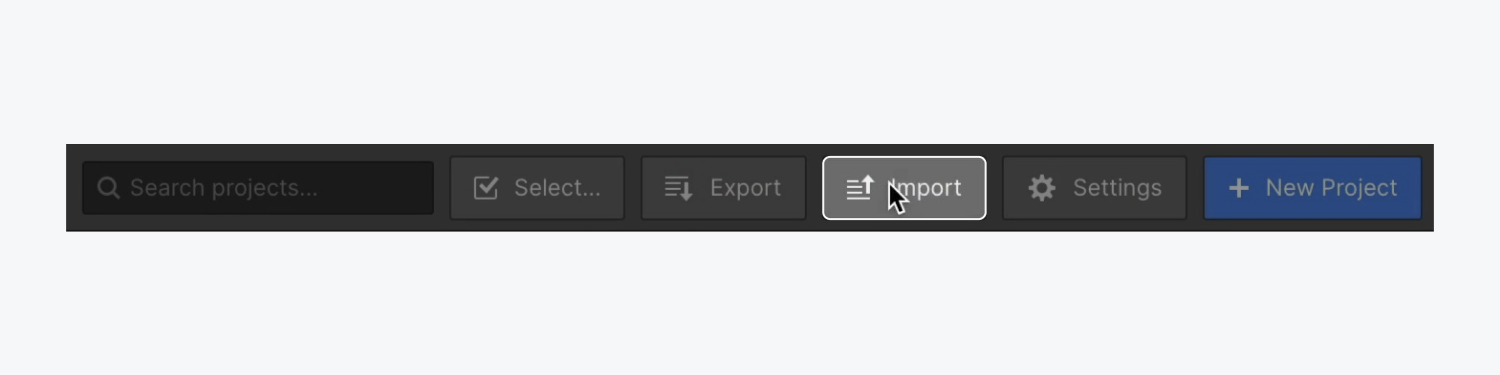
- Open your “Projects” CMS collection in Webflow
- Press “Import” and drag your CSV file (e.g., “Client projects.csv”) into the Upload CSV modal
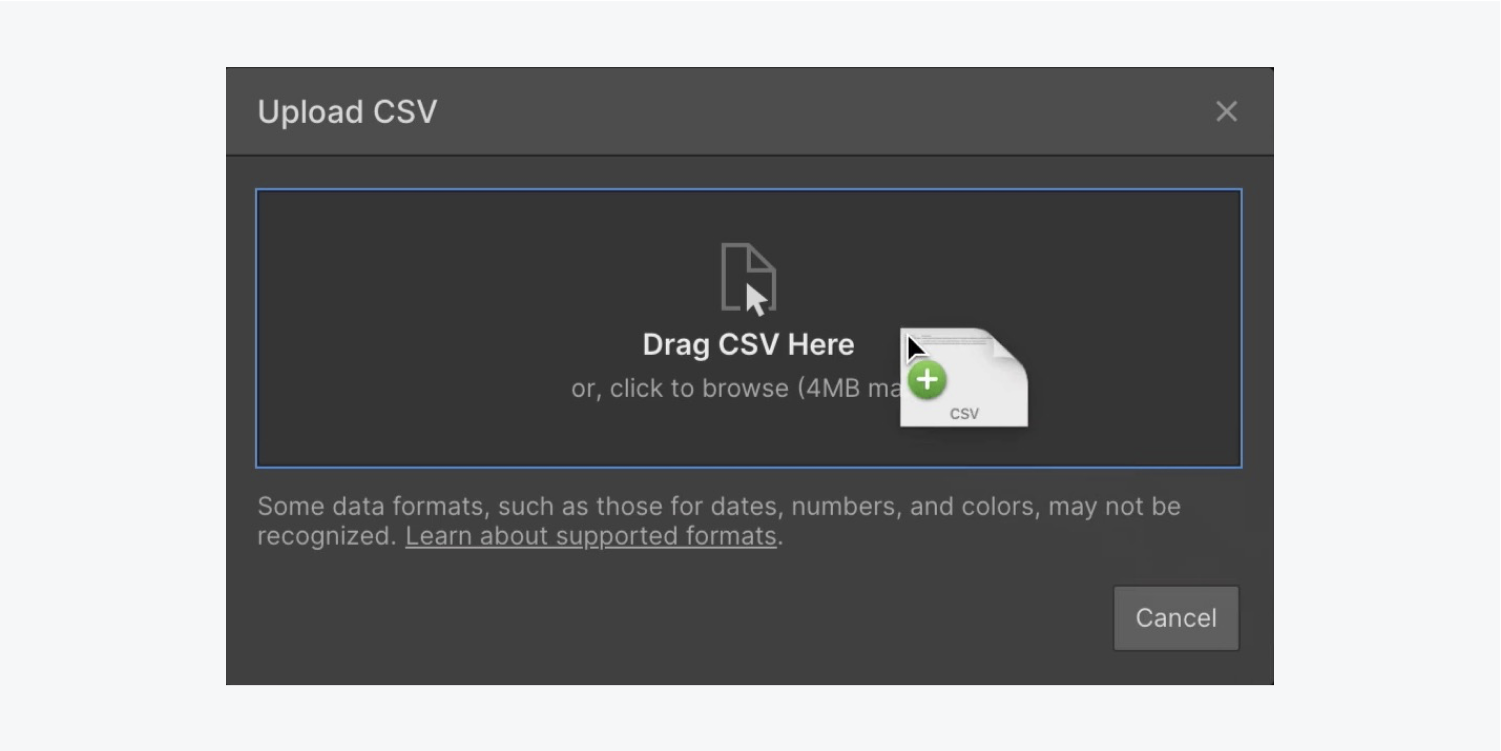
Indicate that the top row in the CSV is the header and press “Continue.”
Match each of the field types to the content in your CSV:
- Click the dropdown next to “Brief description” and choose “Map to existing field”
- Click the “Select field” dropdown and choose “Brief project description”
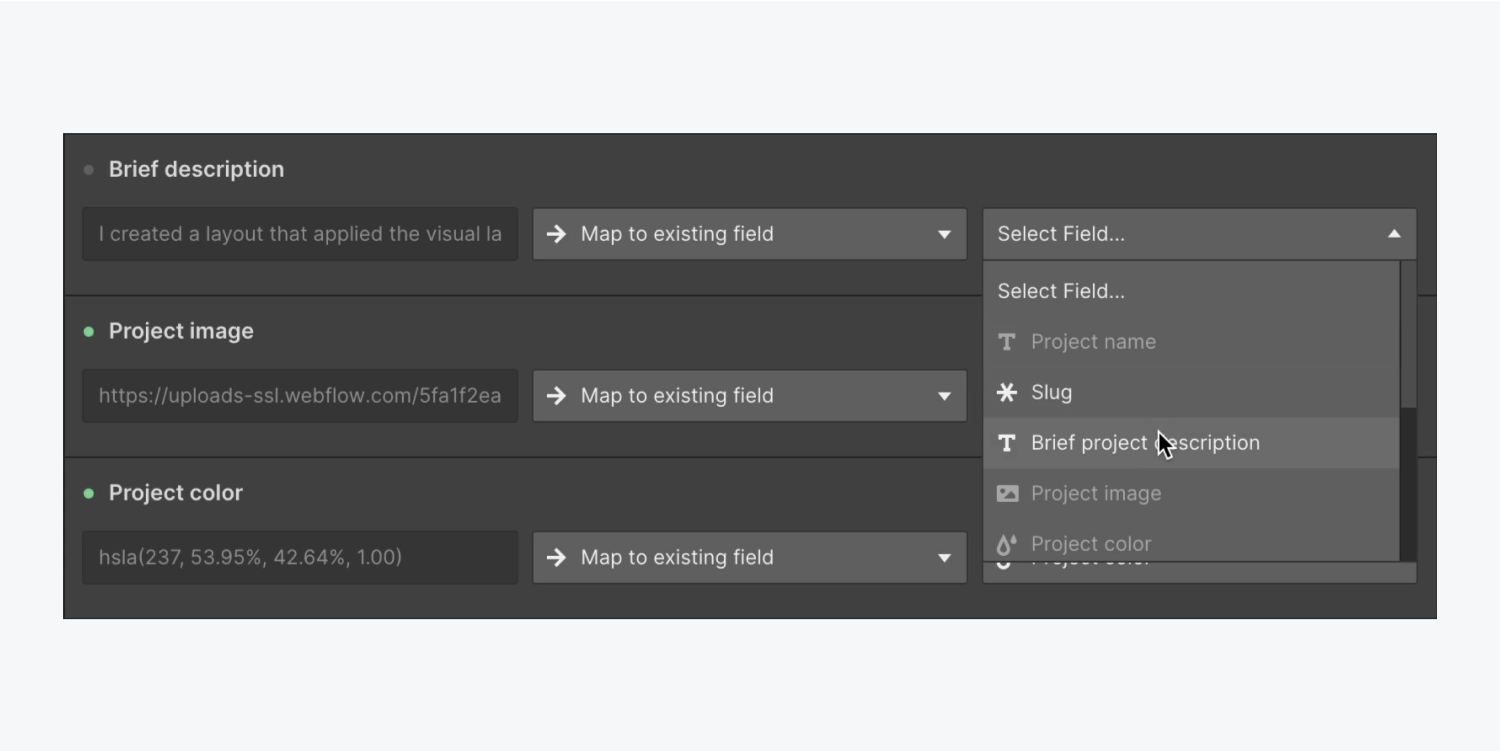
Note: Sometimes fields may not automatically match your imported CSV content if the CSV field isn’t worded exactly as it is in your Collection. If this is the case, you can still manually match your fields. Read more about importing Collection items.
Repeat the above 2 steps to match the remaining “Project type” and “Link to project” fields.
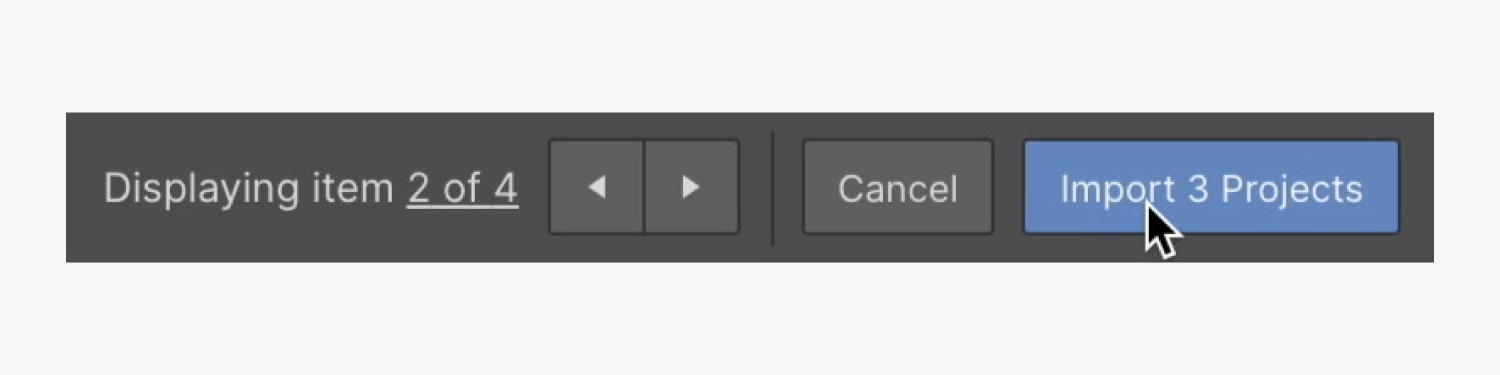
Once all fields have been matched, press “Import 3 projects” to import all your CMS content and press “Close” once it’s finished.
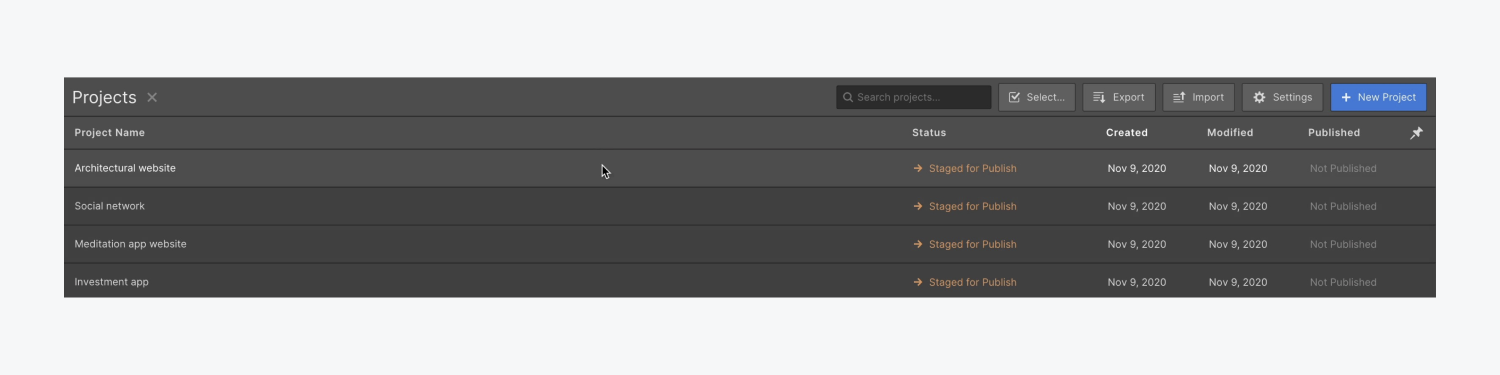
Note: Click the “pin” icon in the upper right of your Collection to preview specific fields you’ve set up for your Collection data.
Build out the design
Close the Collection to return to your homepage and begin designing with the data you’ve added.
We’ll use a Collection list to contain that data, and we’ll set it to reference the “Projects” Collection you just created. Let’s add a Collection list to your page:
- Open the Add panel
- Scroll down to CMS
- Drag a Collection list into the Container and under the Paragraph
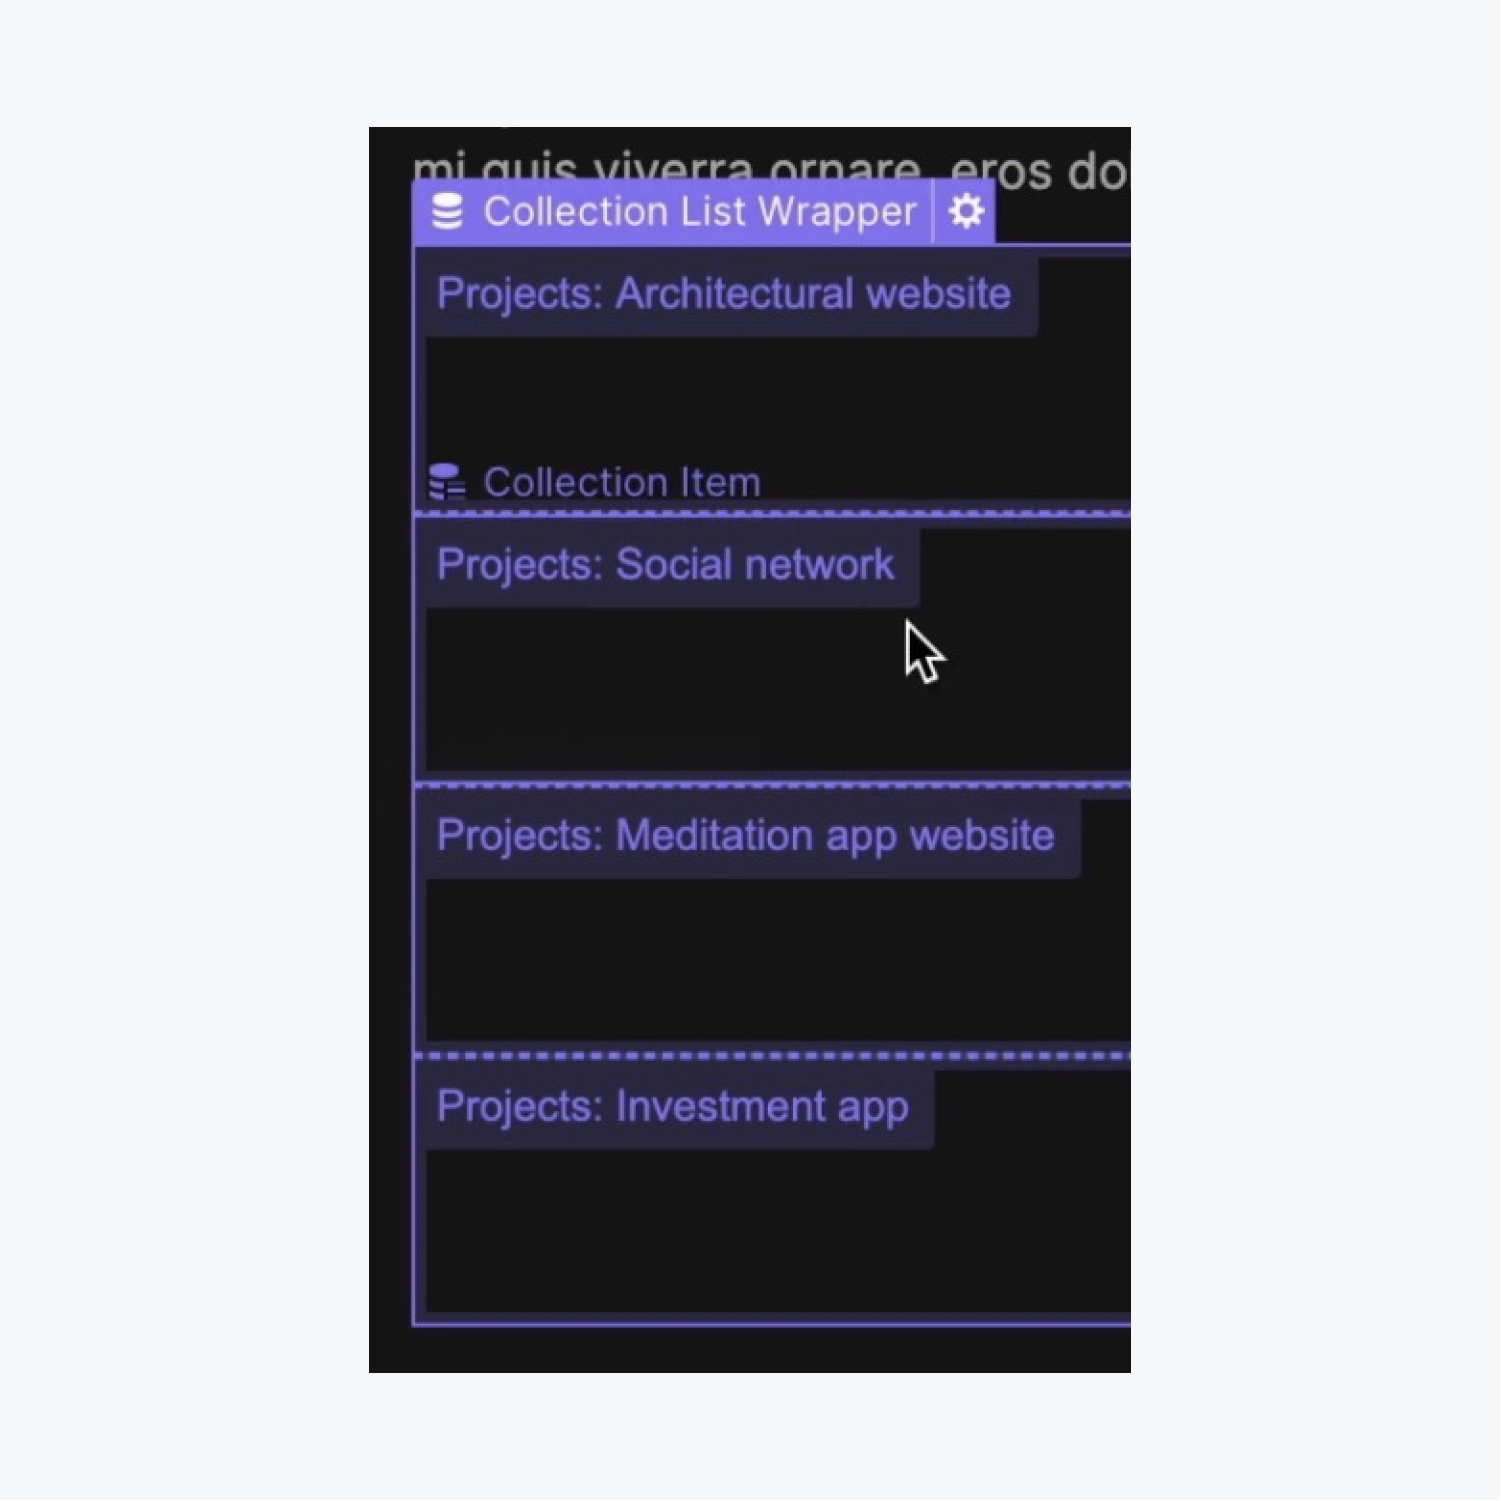
Once you add a Collection list to your page, placeholder Collection items automatically appear. To add your data to the placeholder Collection items, you first need to link the Collection list to your Collection:
- Choose “Projects” (your Collection) as the Source in the Collection list settings modal

Let’s add elements to our Collection list and start with a Heading:
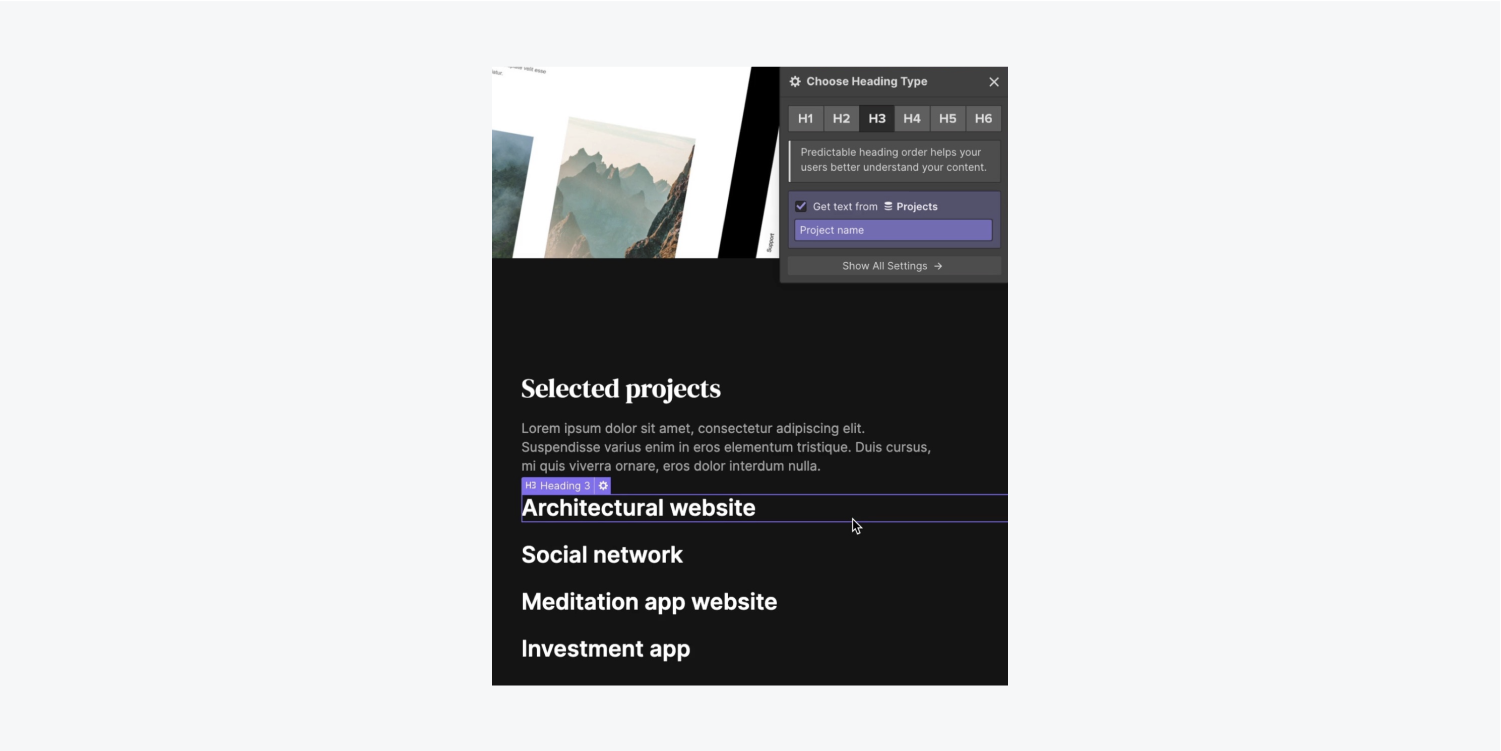
- Open the Add panel and drag a Heading into any of the Collection items
- Change the Heading to an H3 to respect heading hierarchy
We’ll see “Heading” on our page 4 times — one heading per each Collection item. Let’s link the Heading to the data in our Collection and watch as our unique information appears:
- Click the Heading’s cog icon to access its settings
- Check “Get text from Projects”
- Open the “Select field” dropdown and choose the field to link to the Heading (e.g., “Project name”)
Add a Paragraph into the Collection list and link it to our Collection data:
- Open the Add panel and drag a Paragraph into any of the Collection items under the Heading
- Check “Get text from Projects”
- Open the “Select field” dropdown and choose the field to link to the Paragraph (e.g., “Brief project description”)
Add a Text block into the Collection list and link it to our Collection data:
- Open the Add panel and drag a Text block into any of the Collection items above the Heading
- Check “Get text from Projects”
- Open the “Select field” dropdown and choose the field to link to the Text block (e.g., “Project type”)
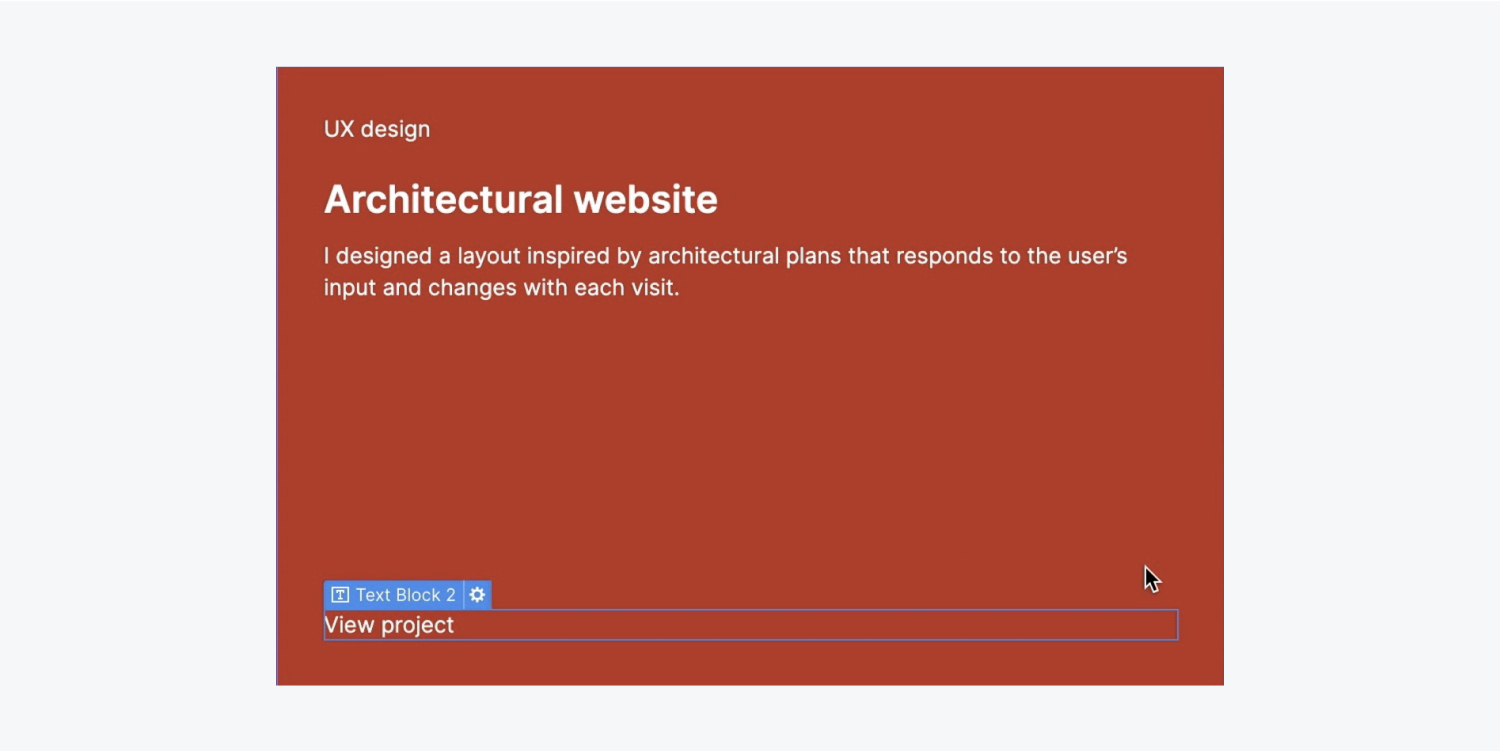
Add another Text block into the Collection list — but this time we won’t link it to our Collection data:
- Open the Add panel and drag a Text block into any of the Collection items under the Paragraph
- Double click the Text block to update the default text (e.g., “View project”)

Note: When you make a change in any one Collection item, it affects all other Collection items in the same Collection list. Read more about Collections.
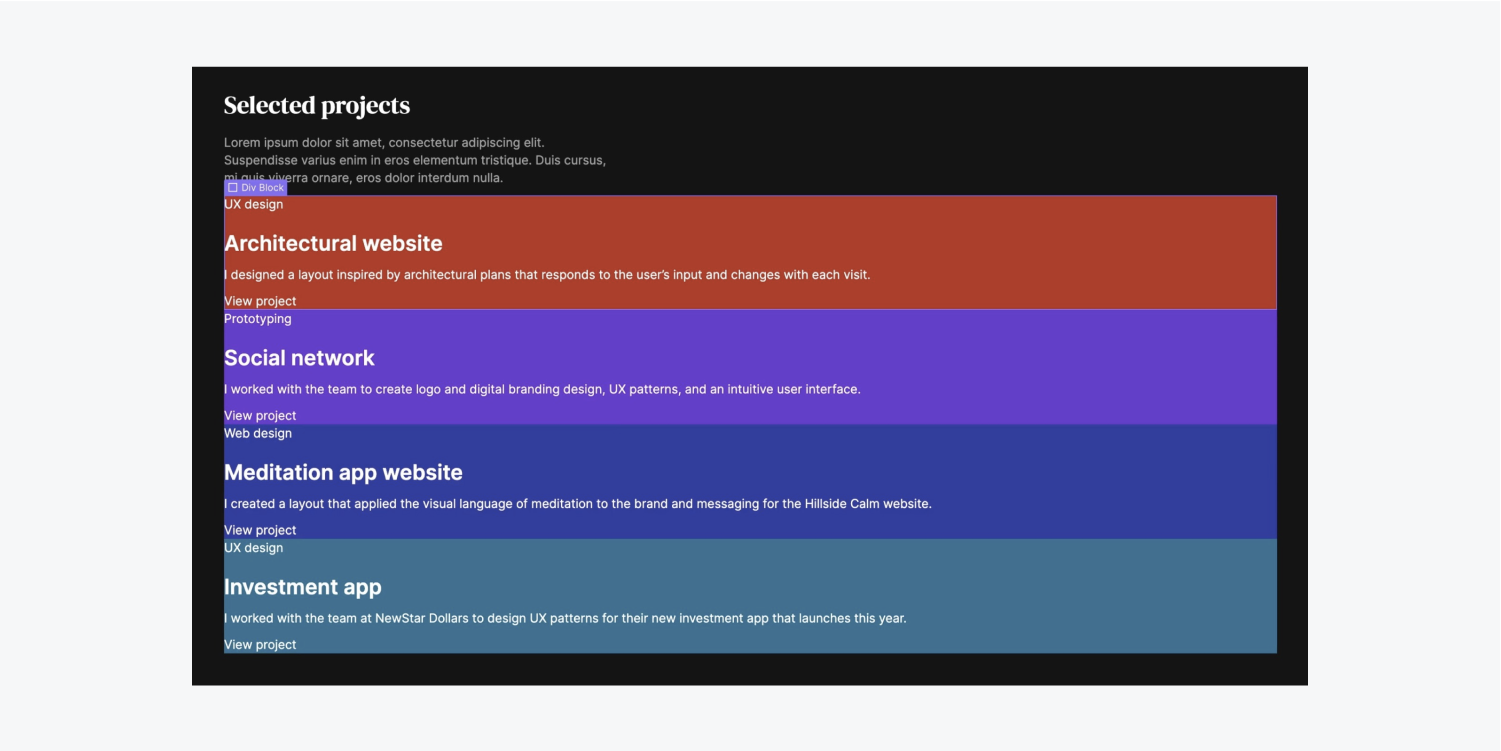
Let’s make the design look more appealing and add a Div block to hold the 4 elements we added previously:
- Select the Collection item
- Open the Add panel and drag a Div block into any of the Collection items above the first Text block
- Drag the Text block, Heading, Paragraph, and last Text block into the Div block

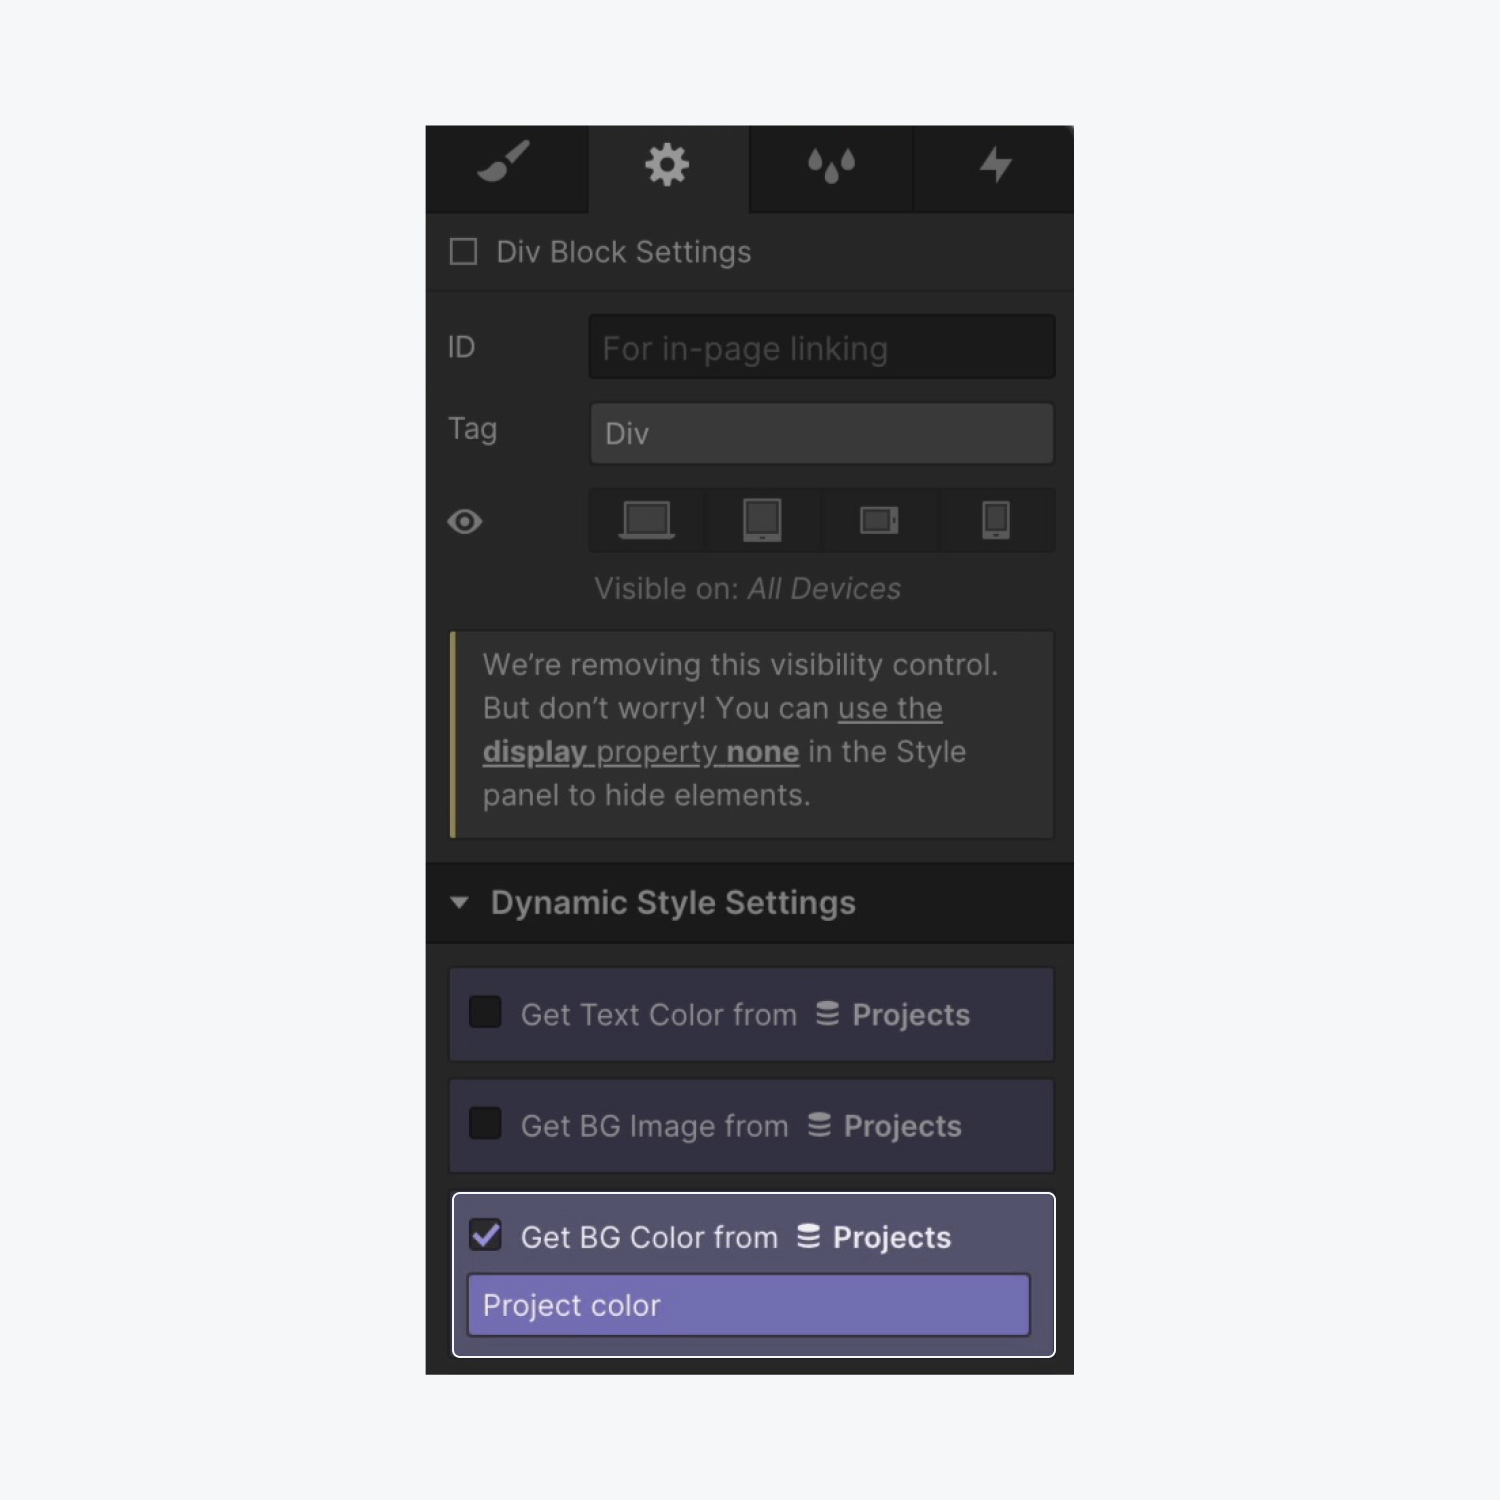
Let’s style our Collection items based on each item’s data from our Collection. In this example, we’ll set the background color on the Div block to use the color from our Collection:
- Select the Div block and open the Element settings at the right of your screen
- Check “Get BG Color from Projects”
- Click into the “Select field” dropdown and choose “Project color”
Let’s create space between each Collection item and add some margin:
- Select a Collection item
- Open Style panel > Spacing
- Add bottom margin of 30 pixels
Add an Image to the Collection item:
- Drag an Image from the Add panel into the Collection item under the Div block
- Check “Get image from Projects” in the Image settings modal
- Open the “Select field” dropdown and choose the field to link to the Image (e.g., “Project image”)
Let’s use CSS grid on our Collection item to arrange them in a more visually pleasing way:
- Select the Collection item — the parent element of both the Div block (that holds all the data inside it) and the Image
- Open Style panel > Layout
- Set Display to Grid
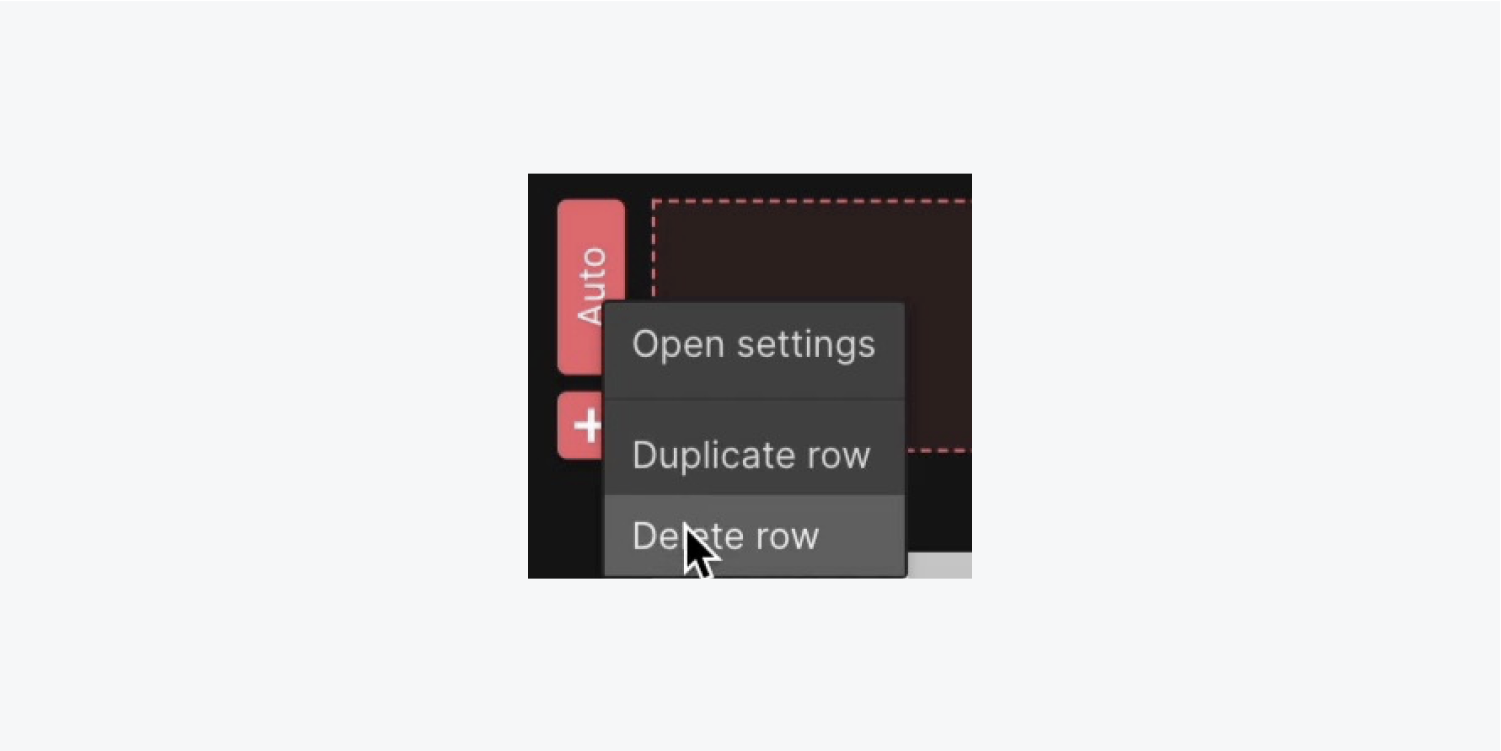
By default, the Grid shows 4 cells — 2 columns and 2 rows. Let’s remove the bottom row to create a 2-by-2 grid:
- Right click the bottom row and choose “Delete row”
Let’s remove the space between the grid cells to create a side-by-side design:
- Grab and drag the edge of one of the grid cells to reduce the gap between the cells to 0 pixels
- Press “Done” to finish editing the Grid
Note: With your Grid selected, you can also set the gap between grid cells by clicking Edit grid under Layout in the Style panel.
Let’s push our text away from the edges of our Div block and add some padding:
- Select the Div block and open Style panel > Spacing
- Increase the padding to 30 pixels on all sides
Note: You can quickly add margin or padding to all sides of an element by holding down Shift, and dragging one of the margin or padding controls.
Select the Div block and give it a specific class instead of its default “Div block” class (e.g., “Project details”)
Let’s apply Flexbox to our newly named “Project details” Div block to allow us to sort our content horizontally or vertically — in our example we’ll choose vertically:
- Select the “Project details” Div block
- Open Style panel > Layout
- Set Display to Flex and Direction to Vertical
Let’s also use Flexbox to help us align the “View project” Text block to the very bottom of the “Project details” Div block (its parent element):
- Select the bottom Text block
- Open Style panel > Spacing
- Set its top margin to Auto
Select the H3 Heading and give it a class along with some styling:
- Select any H3 Heading in your Collection item
- Click into the Selector field and give it a class (e.g., “Project name preview”)
- Open Style panel > Typography and change its font (e.g., “DM Serif Display”)
- Update its weight to 400
- Decrease the font size to 20 pixels
Let’s decrease the opacity of the top Text blocks:
- Select any top Text block in your Collection item
- Open Style panel > Typography
- Click the color picker and change the opacity to 63
Select the Paragraph in your Collection item and repeat the above 2 steps to also decrease its opacity to 63.
Click into the Selector field and rename the Paragraph’s default class (e.g., “Project type preview”).
Let’s also adjust the appearance of our Grid to offset the design:
- Select the Collection item
- Press “Edit grid”
- Drag the FR (fraction units) of the Grid to .8FR
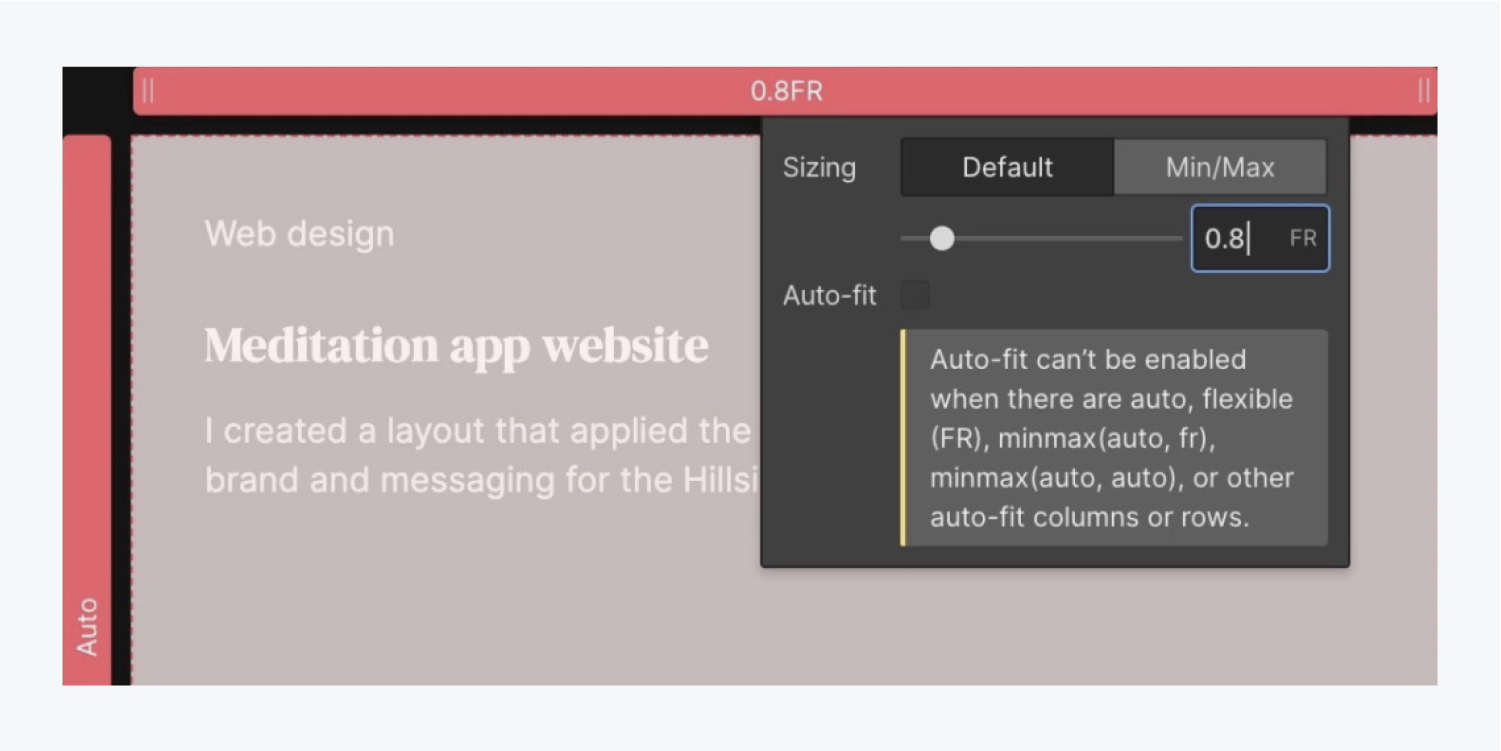
Note: You can precisely adjust the FR units of your Grid by clicking into the grid cell’s row or column heading and typing in your specific FR.
Lastly, maintain class organization and click the bottom Text block to give it a class (e.g., “Button text”).
Nicely done — promote those projects of yours!