
The Figma to Webflow App lets you seamlessly import components and variables from Figma into Webflow. To get started, you’ll first need to install the Figma to Webflow plugin.
In this lesson, you’ll learn:
- How to launch the Figma to Webflow App
- How to sync and import variables and components
- How to sync previously-imported components
- How to review updates to components with conflicts
- How to sync previously-imported variables
How to launch the Figma to Webflow App
First, open your Webflow site, and launch the App from the Apps panel. Then:
- Go to the Figma plugin
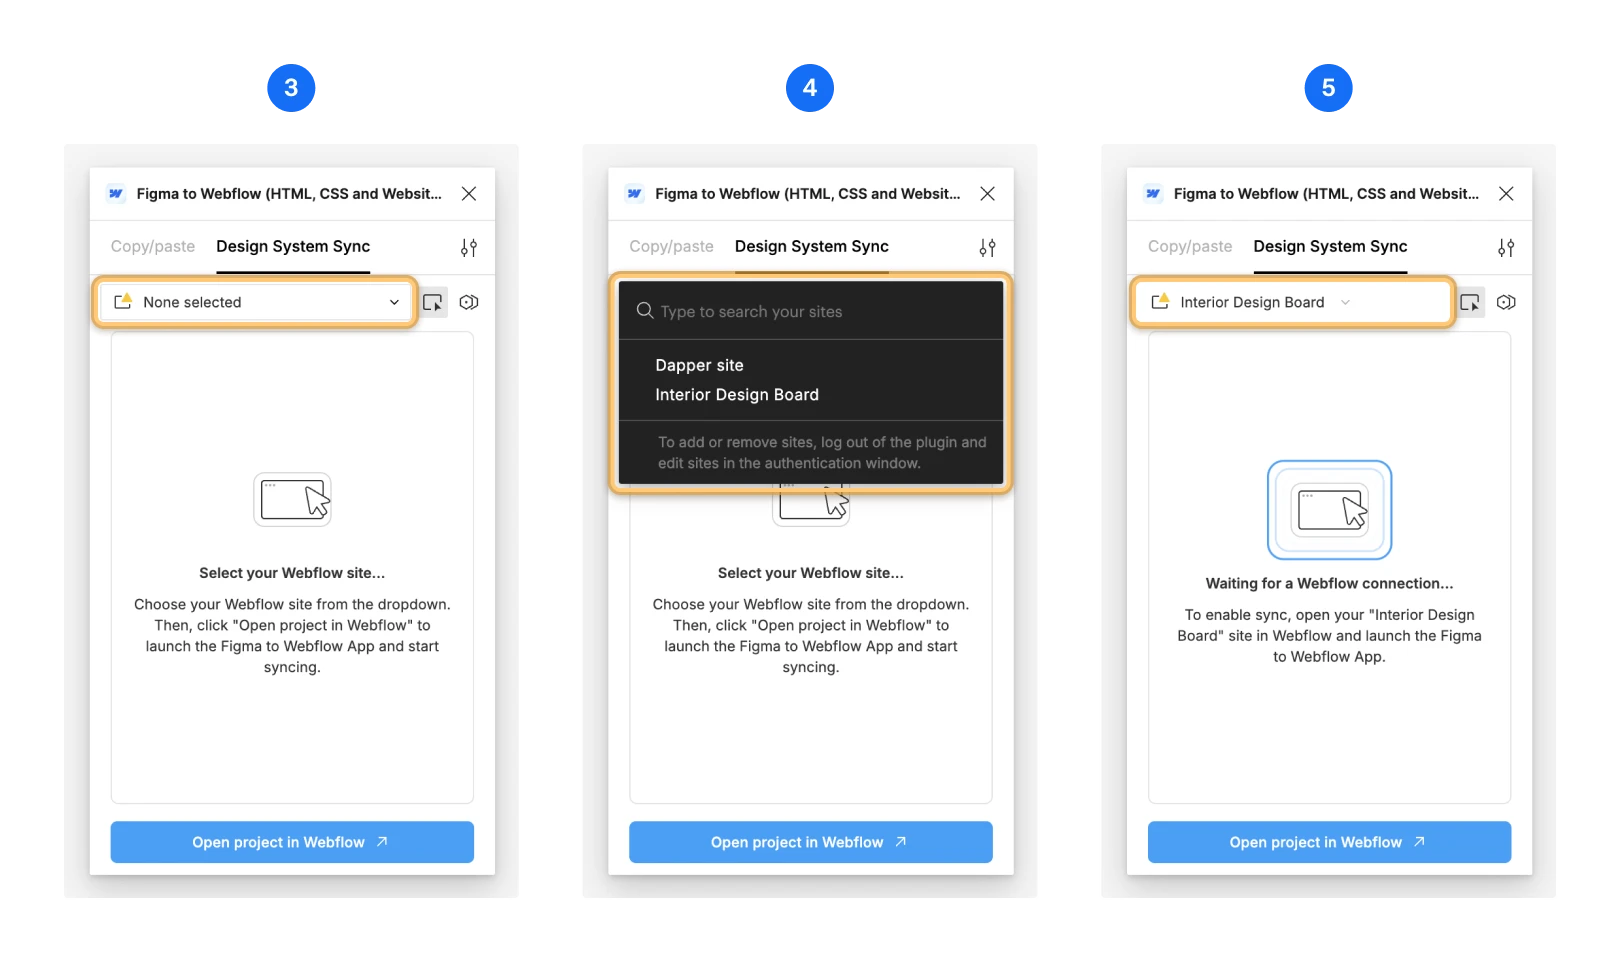
- Go to the Design System Sync tab
- Make sure the correct site is selected in the dropdown (i.e., the site with which you’re syncing the Figma plugin)
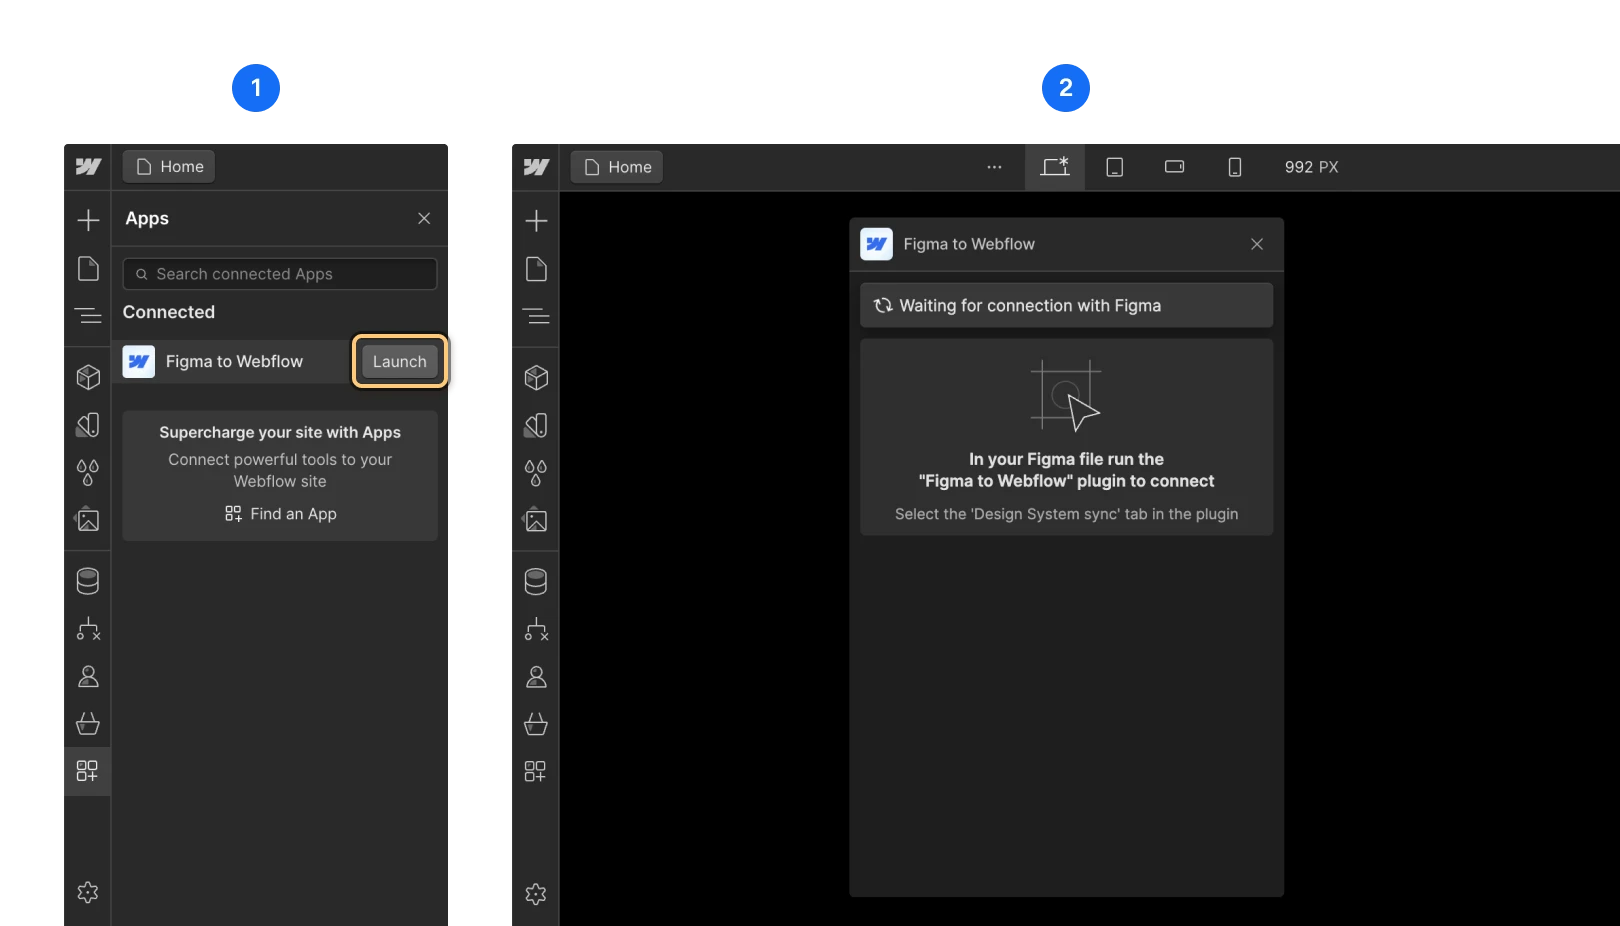
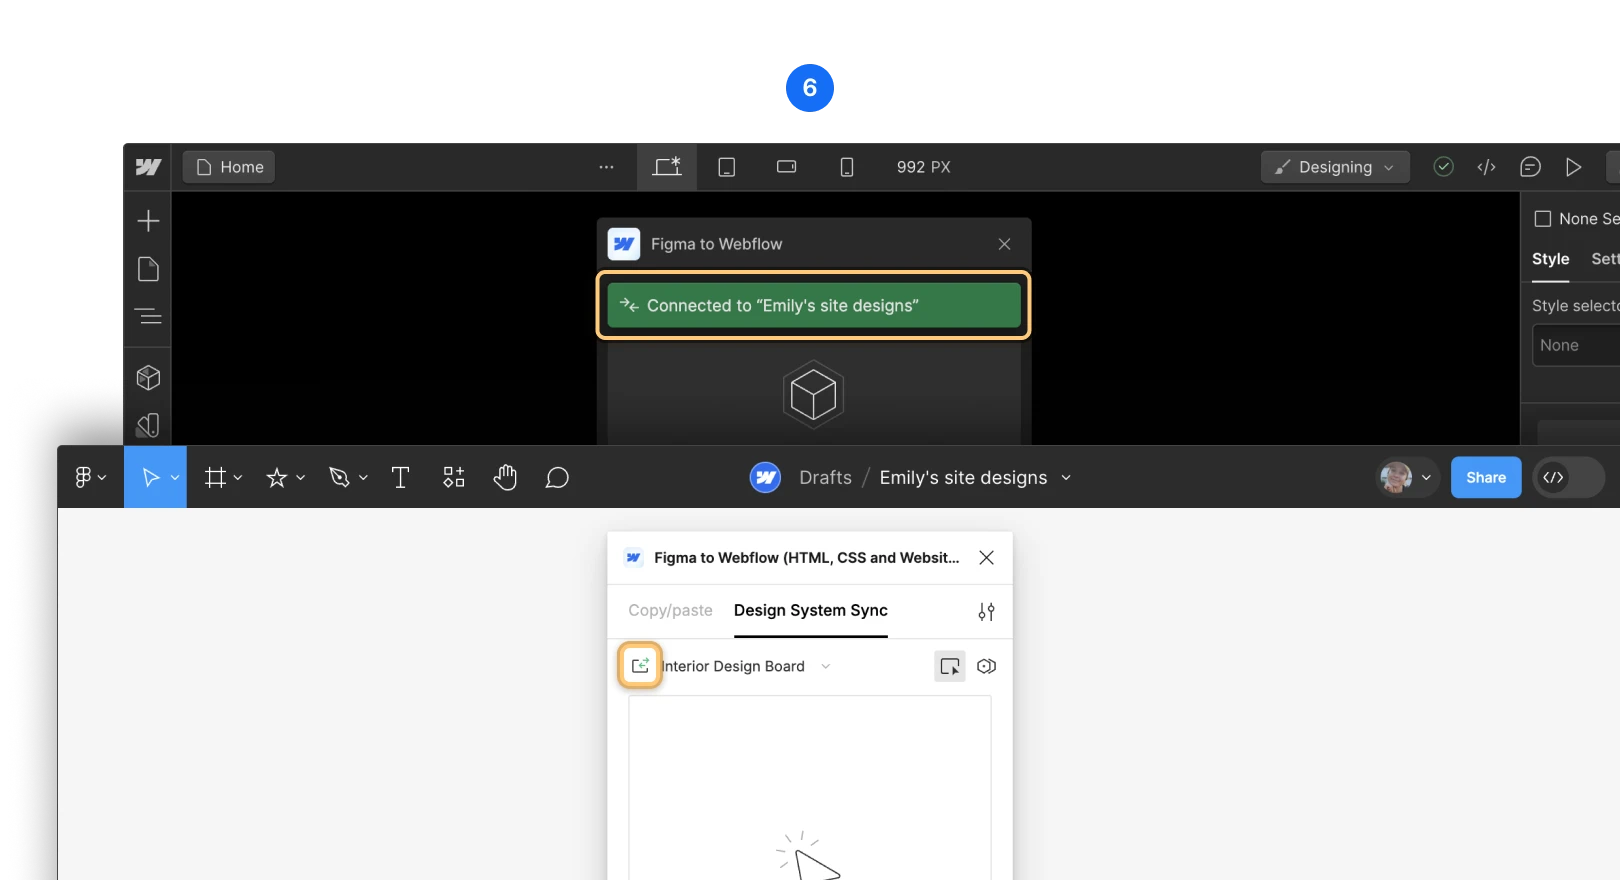
Once the plugin shows that it’s connected, you can sync variables and/or components.
How to sync and import variables and components
Set global units for number variables
If you want to globally change the units used for number variables, you can do so in the Figma plugin modal. Then, all variables will use the specified unit when syncing to Webflow.
- Go to the Figma to Webflow plugin modal window
- Go to the Design System Sync tab
- Click the icon in the upper right corner, next to Design system sync
- Click Plugin settings
- Use the Number variables unit dropdown to set the global units (i.e., px, em, or rem) for number variables
- Go back to the Design System Sync tab
- Click Sync to Webflow
Then, you can go back to Webflow and sync your new number variables unit in the App modal window by clicking Import and update variables. Any variables currently in use on the canvas will be adjusted to the new number variables unit.
Note: Figma only displays variables in pixels, so your imported designs may look differently in Webflow than they do in Figma.
Syncing and importing variables
To choose which variables to sync and import:
- Go to the Design System Sync tab
- Click the “variables mode” icon in the top right corner
- Select the variables you want to sync
- Click Sync to Webflow
Then, you can go back to Webflow to import your variables in the App modal window. You can check or uncheck boxes to choose which variables to import. Then, click Import variables. Once you’ve imported variables, they’ll appear in the Variables tab.
Syncing and importing components
To choose which components to sync:
- Go to the Design System Sync tab
- Click the “select mode” icon in the top right corner
- Select one or multiple components on the Figma canvas by using Shift + click
- Click Sync to Webflow
Once the plugin syncs your components you can go to your Webflow site and review updates in the Figma to Webflow App.
- Click Import new components to review the newly synced components
- Select which components you want to import to your Webflow site
- Click Import component(s)
Once you import a component from Figma, Webflow has a connection to that component. Later, you can re-import the same component from Figma and review its design updates directly in Webflow. Note that only element positions and styles are updated. If you have properties or bindings they'll remain in Webflow.
Note: Component variants are imported to your Webflow site as duplicate components unless you deselect them when syncing.
How to sync previously-imported components
To sync component(s) you previously imported to your Webflow site, first go to Figma and open the plugin window. Then:
- Make sure the correct site is selected in the dropdown (i.e., the site with which you want to sync your components)
- Click the “select mode” icon in the top right corner
- Select the component(s) on your Figma canvas
- Click Continue in the plugin modal window
- Click Sync to Webflow
- Open the Figma to Webflow App in your Webflow site
- Click Component updates in the app modal window
Then, you can click each component to view:
- Styles that have changed (e.g., color, font, etc.)
- Variables added to or updated with the component
- New elements added to the component
You can click Update Component Styles and Variables to update a single component from its preview, or click Update all components from the Review component updates page. All instances of the component(s) will update across your Webflow site.
How to review updates to components with conflicts
Conflicts in previously-imported components occur when you’ve removed one or multiple elements from your components in Figma and those elements are still present in Webflow. To review updates to components with conflicts, click Component updates with conflicts in the app modal window. Then, you can click each component to view its missing element(s).
From there, you have three options:
- Delete missing elements — update all instances of the component in Webflow as usual (this will remove the element(s) in the component)
- Import as un-synced component — import the component as is to Webflow. The component can’t be synced from Figma to Webflow in the future.
- Revert changes in Figma — you can go back to Figma and add the removed element(s) back to the component, which will remove the conflict
How to sync previously-imported variables
To update variable(s) you previously imported to your Webflow site, first go to Figma and open the plugin window. Then:
- Click the “variables mode” icon in the top-right corner
- Click Continue
- Select the variables you want to sync
- Click Sync variable(s) to Webflow
Any variables that have been updated in Figma and synced to Webflow will appear in the App modal window. The window will display the variable’s initial value and the new value. You can choose which variables to import, then click Update variable(s).